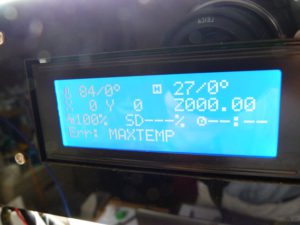
You switch on your printer and load up the model you want to print.
You press the button to start your printer creating the latest masterpiece.
And …..
on the lcd is the error message MAXTEMP error
Nothing is happening.
You switch it off and back on – just in case, with a sinking feeling inside.
And this time the message comes up straight away.
What do you do, where do you turn to?
Arghh, help!!
This does happen and it is worth being prepared for it.
I know, I had it when I really needed to get a print finished for a gift!!
That ended up being a ‘sorry it’s late’ gift!!
How is the temperature measured?
The controller reads the temperature of either the bed, if heated, or the hotend with a thermistor.
The thermistor is a device which changes resistance when a temperature change is applied to it.
If your controller sees an abnormally high temperature then it will flag an error and shut down the heating circuit.
The thermistor starts out at 100kR at 25C and when heated very quickly goes down in resistance, known as negative temperature coefficient (NTC). But follows a manufactured temperature curve.
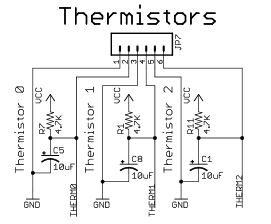
A voltage is applied on the controller board to a 4.7kR resistor and the bottom end of this resistor is fed to the thermistor. The bottom end on the thermistor is grounded. So the junction between the two resistances will indicate the temperature of the thermistor.
The voltage is fed in to the controller on an analogue input pin and sampled.
Comparison to a lookup table gives an accurate result of the temperature.
So if I see MAXTEMP what do I do?
This error can be caused by a few things
the most likely are the thermistor wires shorted or
Software glitch
With fault one you need to switch off the printer and wait for the hotend or bed to cool.
Examine the thermistor leads, especially the insulation very close to the bead. If this has moved back it can cause the two leads to short out.
Why does this maxtemp error happen
Well the print head and the bed are moving and if the wires to the thermistor are not secured they will also move. This movement can cause friction between the insulation of both wires causing one or both to move. Continued movement will move the wires and can cause a temporary or permanent short.
With the software glitch, this may be cured by simply switching off and back on. At the very worst you will need to re-install the software into your printer.
How do I fix it.
If it is down to the insulation moving then readjustment of the insulation is all that is required. Isolating both wires will cure this fault.
If the wires are broken and shorted then unless there is enough wire visible to solder the break together you will need to replace the thermistor.
How do I replace the thermistor?
For the hotend you will need to remove the thermistor.
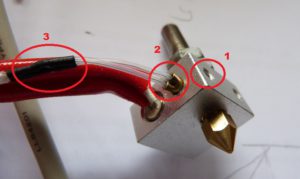
These can be glued or screwed to the metal heater block. If it is screwed you will need to carefully unscrew the screw holding the thermistor down. If it is glued you will need to carefully cut the thermistor away from the metal block.
In the picture you have 1 – grub screw
2- thermistor
3 – solder joints
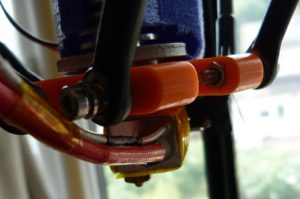
If the glue is grey, it is a thermal glue and all of this will need cleaning off before replacement.
Check with the manufacturer for the correct thermistor, they have different curves and unless you want to change your software you need to match the thermistor characteristics. The characteristic you are looking for is the b or beta.
These are readily available from Amazon, E bay, or the manufacturers.
When replacing the thermistor you need to be careful as the bead is made of glass. Don’t hold this end in pliers as you may break the glass.
You must solder the wires quickly to prevent the heat from the iron damaging the sensor. Keep the iron at least 6mm away from the sensor and only keep it on the lead for about 2 seconds.
Make sure the insulation goes right up to the bead before replacing.
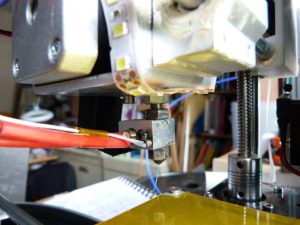
When using the screw to hold it down make sure you don’t cut through the insulation when tightening.
When replacing with glue make sure the insulation is right up to the bead and the wires will not short out on the block.
Once you have replaced it, it is a good idea to test the heating before going into a print.
Use the preheat PLA to get the hotend up to about 180C and stabilised.
Make sure the temperature stays within a couple of degrees over a 5 minute time period.
Wiggle the wires to ensure that they will not short when printing.
For the build platform, the thermistor is normally stuck down with kapton tape.
unpeel the tape – touching as little of the glue side as possible to reuse the tape.
Make sure the leads are not shorted, push the insulation up to the glass bead.
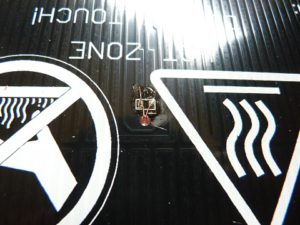
Ther are some heated build platforms which have the thermistor soldered to traces close to the middle of the board, in this case unsolder the thermistor and replace, the device is not polarised, can only be connected one way round. It doesn’t matter which lead goes to which trace.
Good luck with sorting this problem out.
It is worth keeping a couple of these in stock, so if this error does come up then you are not stuck for a few days or weeks until the new one arrives.
These are readily available from Amazon, E bay, or the manufacturers.
if you have come across any other faults with maxtemp leave a comment in the box below so we may all learn from your experience.
Thanks for reading
Phil
