Think it is difficult printing with the Anet A8 and TPU? Read this article to the end to find out my hints and tips

Ok so you have bought an Anet A8 3d printer.![]()
You have downloaded some models from Thingiverse or other sites.
These have been hit or miss, but more hit than miss.
Only using PLA.
But you know your printer is capable of much more than this.
It can cope with PETG, ABS, nylon and flexible.
You have done your research.
ABS – too toxic without an extractor to remove the fumes ( or from my point of view – memories of trying to repair motorcycle plastics)
PETG – need an enclosure to prevent draughts and get stable (ish) temperatures over the bed to prevent warping.
Nylon – soaks up the water and needs special drying.
This leaves flexible (TPU or TPE).
So what is it exactly
Flexible polymers are lumped under the heading TPE (ThermoPlastic Elastomers), with (#ad) TPU (Thermoplastic PolyUrethane) being the most commonly available.
Most are known by their brands name – like Ninjaflex or Flexismart.![]()
They are comprised of a rubber compound along with a hard plastic, the mix of the two giving the degree of flexibility.
You see the images of people bending this, but until you have tried it you won’t believe how flexible it can be, or how useful that can be – for phone cases and the like.
What do you need to know about printing TPU
You know how to set your printer for PLA…
So now you need to know how to set your Anet A8 3d printer up for TPU.
There are two main things to remember when printing with flexible filaments.
You can’t push too hard, as it is flexible and will bend.
And take your time, slow your printer down.
With PLA you managed to get close to 100mm/s printing speed, well if you try that with TPU you are likely to fail.
You can’t melt it fast enough or push hard enough to get the filament out of the hotend.
Typical printing speeds are in the order of 30mm/s max, ideally 20-25mm/s, so things are going to take a bit longer to print.
You ideally need to switch off retraction as well.
Pushing and pulling back on the molten filament may cause a jam, the last thing you want.
Careful setting of the temperature will reduce to a minimum the amount of stringing you get.
So set the nozzle temp to about 225C and if you suffer too much stringing then reduce your nozzle temp by 5C and try again.
You will know when the temperature is too low by the poor adhesion between layers or the part not sticking to the bed.
The bed needs to be about 50C, I also used blue painters tape.
You are not supposed to heat the bed with blue painters tape, but I found it worked better with heat and tape.
You can print onto glass and get a very smooth finish to the bottom of your prints.
I will be trying onto polyamide tape in the future and will keep you updated on the progress.
That all important first layer
With PLA – you know that unless your nozzle is just right you will be starting again…and again…and again.
With TPU as it is rubbery there is a little more flexibility in the gap between the nozzle and the bed.
This doesn’t mean that you can be sloppy when leveling you bed, but it does mean that there is more leeway.
If the gap is too small and the pressure builds up in the nozzle and backs up the molten filament, you may get a blockage, so err the gap on the larger side.
As long as you get a bit of pressure onto the bed it will stick.
Especially if you are using heat and blue painters tape.
Make sure there are no overlaps on the tape, butt the edges together.
I tend to lay the edge down and wipe away to lay this down.
Replace any strips that get damaged when removing parts.
If it is not sticking then increase your nozzle temperature by 5C and see if that helps.
But check the nozzle clearance.
Replace the tape after 5 or 6 prints in the same area.
First prints
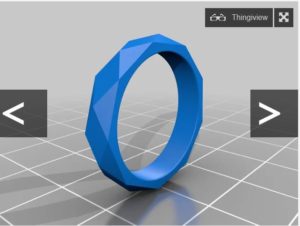
So what did I print as a first TPU print?
A faceted ring, why – this was the only model which said it finished in under 5 mins.
Did it go well?
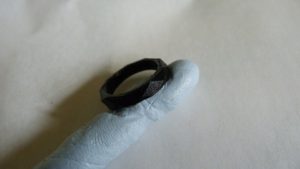
The first time the filament had not fed into the hotend quickly enough, so I had half a layer that didn’t print. so I stopped the print.
The second attempt showed up the flexibility of the filament as it decided not to go down the throat and wrap around the extruder gear.
But with this filament, unlike PLA, you can just reuse that bit.
So I printed off a flexible filament guide to reduce the gap between the extruder gear and the throat.
That appeared to cure that and the ring printed perfectly.
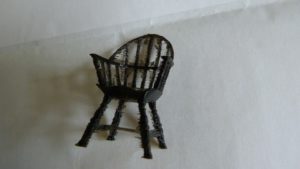
So another challenge I have had is printing a windsor chair – I failed a few times with PLA as the bed wasn’t set correctly so…
With it sliced again for TPU, the four leg patches stuck perfectly, so hopeful…
Then printing higher I could see what they said about stringing.
Between the legs was this fine webbing, ok so I will get rid of that when it finishes.
Watching it do the bridges between the legs, I wasn’t so sure about the bridging ability of the material.
The seat turned out ok and the back with it’s open frame was covered in stringing.
Overall it printed ok.
Not the prettiest print but it stayed on the bed and finished.
Cleaning up TPU
New scalpel blade.
and….
Damn this stuff is flexible.
Rubbery and hard to cut.
So yes with complex models I will need to play around with the temperature to reduce the stringing, I think mine is too hot at the moment.
Am I impressed that you can print a flexible filament – hell yes.
I still smile picking up the chair and flexing the back of it.
The ring looks more like an o-ring, so is less impressive, but the chair…
Am I going to continue with this stuff, hell yes.
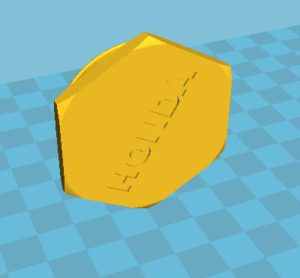
I designed some covers for a motorbike, they cover up the swinging arm bolt.
Previously I had printed them in PLA, they fitted quite tightly, but at the speeds this bike goes are on the roadside somewhere.
With this flexible filament then they will have a lot more grip, so are on the printer as I am typing this up.
I can here it singing…Oh hang on…. it’s stopped so may have finished.
I have now found I have a lot to learn about flexible filament design.
The flanges are too thin and too flexible to hold them in.
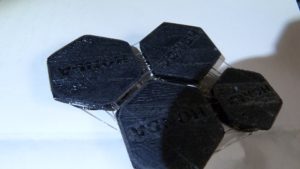
Using the outer face onto the bed of the tape causes them to be too matt.
I will try to post process them, but probably will struggle to find a material flexible enough bend with the filament.
Will I give up …no way.
What other ideas do I have?
Well what about replacement heels for shoes?
It does bring up a few questions…
- Is it strong enough
- Will it withstand walking on
- How long will it last
- Is it grippy enough to be safe?
All of these questions will be answered soon as I have a pair of my other half’s to reheel.
Am I impressed.. Oh yes.
So thanks to 3d warhorse on Amazon.
I bought the 0.5kg reel to try.
Apparently it can be used in a 3d pen as well.
I wonder how well it will stick to PLA to create hinges.
All I have to do is to keep it dry.
So back into the bag with some more silica gel.
Would I Try It Again?
If you have only tried PLA till now, then I reckon your next step is to buy some of this and give it a go.
Just remember to slow your printer down, raise the temp of the nozzle, switch off retraction (or at least keep it a very low value) and use blue painters tape on the bed…and you should have some good initial results.
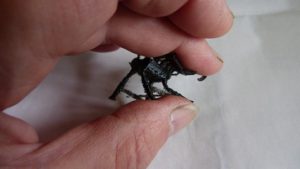
From there you can tweak your settings to make it even better.
If you have any more tips on printing TPU then please leave them in the comments below
If your printer has a bowden extruder, can you print with flex filament.
The theory is yes as it is the bit between the extruder and the throat that is important.
But you have to bear in mind that along the full length of the bowden tube the filament will be compressed so there will be a lag when the extruder starts to push and the filament comes out of the hotend.
So add a couple of skirts around the outside.
I do have a printer with a bowden extruder so can try this out.
And you won’t be able to use retraction with any accuracy on this machine – but may be able to take the pressure off to reduce stringing.
But I don’t see it as a restriction.
I have heard that if you use a (#ad) kitchen blow torch (you know…the![]() ones to caramelize the top of things) and wave it over your model, not stopping in one place, that you can melt the stringing and make it disappear.
ones to caramelize the top of things) and wave it over your model, not stopping in one place, that you can melt the stringing and make it disappear.
Oh another tip – from what I hear TPU can jam easily.
So I have got into the habit of leaving my Anet A8 printer nozzle to cool down to ambient before switching it off. This will prevent heat creep into the throat making it more difficult to push the filament through next time.
And don’t forget to take your model off the bed while the bed is still hot – taking it off cold may prove tricky!
Please leave a comment below if you have used a bowden extruder with flexible filament- either successfully or unsuccessfully. or you have used your anet a8 3d printer with TPU.
Thanks for reading
Phil
update: I have now got a geeetech A10T with bowden extruders and had read that it is difficult to print tpu with bowdens…
well if you go and read the post about the mods i did to the extruders then you wil lfins out whether i managed to print with it….these mods could be done ot any bowden extruder not just hte A10T

Excellent tips. Thank you sir.
Hey John, thanks for dropping by and commenting….
I’m glad you liked the article…
What are you printing and did it succeed….
Phil
That was a nice read, thank you for sharing.
You really made me want to go for a ride with TPU. I guess I’ll try it soon.
Thanks for the comment…
TPU can be really frustrating stuff to work with but once you get it dialed in then it works well…
the main thing i found was speed….real slow….and i mean real slow…especially that first layer
you do get stringing, or at least i did, as i didn’t have any retraction…
i have seen others use a bit and have less stringing…
one of my trials in the future will be to try retraction…
But it is a fun material to use and see others faces as you crush your model only to have it spring back to it’s original shape….
definitely worth a go…