Ultimaker 3 review

This Ultimaker 3 review is about a prosumer dual extruder 3d printer with wireless control, operating on the FFF (fused filament fabrication) method. It is an industrial grade printer equally at home on the desktop as in the living room.
Lets have a closer look at it

It’s large build volume of 215x215x200mm ( 8.5×8.5×7.9in) defies the outer size, as it fits conveniently on your desktop. Outer dimensions 342x380x398mm( 13.5x15x15.5in). (The print volume drops slightly when in dual material mode to 197x215x200mm (7.75×8.5×7.9in). There is also an extended model with the Z axis extended up to 300mm.
The printer comes with two print cores for build and support material. The customized nozzle geometry reduces the risk of clogging and give you a more reliable 3d print experience. There is an integrated pcb on the print head to ensure a more accurate temperature control and superior print quality.

The ultimaker 3 can print at temperatures up to 280C, so the printer can print in a number of different materials.
Fast print core changes mean fast up time and easier maintenance, there is nothing worse than a nozzle clog to annoy you when you are up against the clock to print something out.
There are led lights within the print core housing to alert you to any user interaction required.
For easy print removal and maintenance there is a removable glass plate. To remove the glass plate simply rotate the clips out of the way and remove towards the front. Make sure the glass is cold before removal. When using the glue stick for adhesion you will be soaking the glass plate and model in water to dissolve the glue.

Levelling the build platform is effortless. When you use it for the first time, simply set the right height by turning the build platform height knob and inserting the supplied calibration card.
After this the ultimaker’s built-in levelling routine does it automatically. The capacitive sensor in the print head measures the distance between the build platform and the nozzle.
When starting a print the offset height is compensated for by adjusting the Z axis height in the first layers. This results in more accurate levelling, build platform adhesion and optimised print quality.
Installation of the correct materials for your model is simplicity, automatic recognition of the reels as they are placed on the printer allow, when connected, the CURA software to load the optimal profiles for quality printing.
The recognition system is NFC built into the material carrier. If you are not using ultimaker material reels then you will need to enter the material manually.
ultimakers range of materials are formulated to give you superior results and the open filament system allows you to experiment with all different types of materials.

To bring your 3d model to life, you will need to prepare it for print using CURA, ultimakers free slicing software. You can stick with the presets for the materials or tinker with the advanced settings.
You can print directly from your pc via the WIFI or LAN settings, alternatively you can load the gcode files onto a usb drive that slots into the front of the ultimaker 3.
The control panel on the printer lets you make any adjustments during the print. The control panel allows updates to the software, when connected to the LAN.

The ultimaker 3 is the most reliable durable dual extruder on the market. Combine two build materials for two colour 3d print or achieve state of the art complexity with build and water soluble support material. This allows you to approach your design process in a completely new way and create astoundingly complex designs.
Ultimakers 3 unique nozzle lifting system ensures that there are no nozzle collision while printing and no problematic oozing.
The powerful geared feeders ensure a more reliable result and superior print quality.
The ultimaker3 features a build platform that is lighter and stiffer which reduces vibrations and produces an unrivalled print quality.
With the heated glass plate you can print using many different materials and have improved build plate adhesion.
Ultimaker 3 has a powerful triple fan system, featuring two new radial fans and fan shrouds. It creates greater airflow, this means better cooling, high quality bridging, faster print times and smoother surfaces.

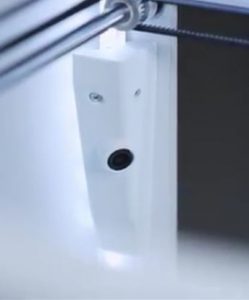
With the addition of the live camera, you can monitor every stage of your 3d printing project remotely, simply by connecting to WIFI.
The ultimaker 3 has a large layer resolution of 20 to 200 microns. Which allows for remarkably detailed prints or superfast prototypes.

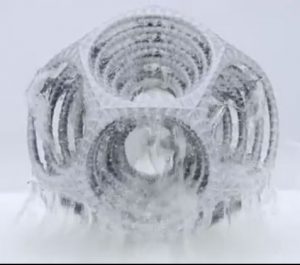
Printing with pla and pva allows complex designs to be printed in place without any post printing assembly, using the water soluble pva as a support material.
Pva can also be printed in dual extrusion with ultimker nylon, an ideal material for exceptionally strong functional prototypes.
Using two build materials you can also produce dual colour prints for more realistic concept models.
The ultimaker 3 comes with free lifetime technical support and warranty provided by certified experts worldwide.
When you put it all together the ultimaker 3 is the most industrial grade desktop 3d printer on the market.
With the price of the printer currently topping £3k, is it worth it?
To get the features within the printer along with the ease of calibration. Your printer will be producing high quality prints time after time.
So the ultimaker 3 review has shown it to be a very very capable printer from a good quality manufacturer.
