All about a 3d print nozzle
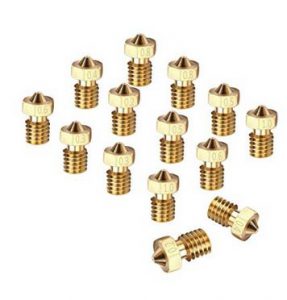
- What is your 3d print nozzle?
- How do you specify your 3d print nozzle?
- What is it made of and why?
- Why are there different nozzle shapes?
- What nozzle size should i use?
- How to change your nozzle
- My nozzle is leaking why
- How to tell if your nozzle is clogged
What is your 3d print nozzle?
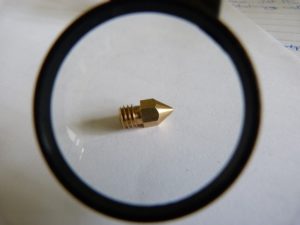
The 3d print nozzle is one of the most important parts of the 3d printer.
Whichever FFF(Fused Filament Fabrication) 3d printer you get it 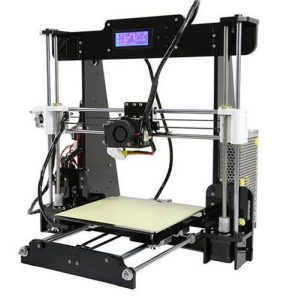

Your nozzle size determines the level of detail you can print.
Your nozzle size determines the speed at which the printer can go.
How do you specify your 3d print nozzle?
The specification of your nozzle is detemined by :
- The size of your filament – typically 3.0mm or 1.75mm
- Nozzle diameter – normal range 0.2mm to 0.5mm
- Nozzle material – usually supplied with brass
- Shape of your nozzle
- Thread size – typically 6mm


You need to match up the diameter of your extruder with the diameter of your nozzle. So supplied filament will usually tell you what size you need to replace it with.
What is it made of and why?
The majority of supplied 3d print nozzles are machined out of brass. Why is this – well brass is cheap and easy to machine along with its property to transfer heat fairly efficiently.
The typivcal fialment used with the 3d printers is not that abrasive, so the soft brass material can be used for month – if not years 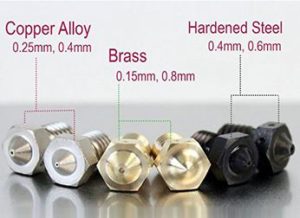

When you start to try out more abrasive materials – like metal filled pla or pla wood you will find that you start to get wear in the size of the nozzle and poor quality prints.
What do you do when this happens?
You look at stainless steel nozzles.
These are more expensive due to the fact he material is a lot more difficult to machine, usually seen with the surface finish on the nozzle.
If you print with nothing but abrasive materials, then you may want to consider changing to a hardened steel nozzle.
With the poor thermal conductivity of stainless steel you will need to carefully calibrate your printer and ensure you can replicate the conditions for good quality prints.
Hardened steel has a better thermal conductivity than stainless but less than brass. It is a lot more expensive than either but is very wear resistant to the common materials used with these types of printer.
You have more exotic choice now with tungsten and ruby inserts becoming available and again the price rises.
For standard materials like ABS. PLA, PETG, Nylon, TPE, TPU, and PC and occasional prints with abrasive material like metal filled PLA and wood filled PLA, you will be good with a brass nozzle.
Just remember to keep some spares in stock.
Why are there different nozzle shapes of 3d print nozzle?
Browsing around to replace your nozzle you are presented with a variety of different shapes.
large hexagonal, small hexagonal, long tip, short tip, broad nose, small nose.
Which do you pick?
Well the shape really does little to affect the 3d print quality.
There will be an effect of mass of the large hexagonal part on heating the already printed plastic, but with the cooling fan you can easily counter this. or if you are worried about it then pick the small hexagonal part.
The long nose versus the short nose makes a bit more difference.
The filament will be cooling more in the long nose rather than the short nose, you have to remember where the heat for the nozzle is coming from. The control loop for the temperature is all in teh metal block above the nozzle – so the further away from this the cooler the filament gets.
What difference does it make?
You may get a slightly more ridged finish with the long nozzle with the fialment cooling quicker as opposed to a smoother finish with the shorter nozzle. But with that you may get slightly less detail with the shorter nozzle than the longer nozzle.
With the broad nose compared to the small nose ( the amount of nozzle material outside the small aperture) there will be a significant change in surface quality – especially on the top surfaces.
When the filment is extruded from teh nozzle it meets the layer below and as the height between the nozzle and the already printed plastic is not greater than the nozzle diameter it is squshed out to the sides.
If you have a thin nozzle then this material may bulge upwards either side of the nozzle. This may cause surface defects and in extreme cases problems with the next layer.
With a broad nozzle it has the effect of flattening the extruded filament leaving a smoother surface.
So you should go for the broadest nozzle?
Wait a minute.
The broad nozzle will also pass more heat back to the already printed plastic, possibly distorting it and losing some detail.
So what do you pick?
For models with fine detail a thin nosed nozzle would be ideal, you will have to tune the printer to cope with this by reducing the amount of filament extruded, but it will give you better detail than the broad nozzles.
For models which you want smooth flat top surfaces then pick a broad nozzle.
What nozzle size should i use?
With the wide range of nozzle sizes from 0.15mm to 1.2mm and larger you may wonder what nozzle size to choose.
You may think that with the smallest nozzle i can get the finest detail, yes this is true. But you will have the slowest machine.
To extrude very finely you will need to slow your machine down to match the filament size, with this the printing time of your models will go up massively.
To give you an example.
A 20mm test cube.
0.15mm nozzle layer height 0.05mm
Wall thickness 1.2mm
Top and bottom thickness 1.6mm
Will take 2 hours 38 minutes according to cura
Going up to a 0.4mm nozzle, layer thickness 0.25mm gives a print time of 17 minutes, and a 1.2mm nozzle with 0.5mm layer height is done in 7 minutes.
So i pick the broadest nozzle, if you do this then fine detail will be lost.
You wil lnot be able to print below twice the nozzle diameter, so picking a 1.2mm nozzle you will be limited to 2.4mm detail. Fine for your vase but for your print of that bust you will have very little detail – unless you print it very large of course.
There is a reason why the printer is supplied with a 0.4mm nozzle, it is the best all round size for what most people want.
Once you determine what you want to d owith your printer you can start experimenting with different nozzle sizes, calibrating and saving the profiles.
This will allow you to produce the best quality model with the right size nozzle.
How to change your nozzle
So you have had your printer for a while and you have not had a clogged nozzle, lucky you, but want to try another type, how do you change your nozzle?
As it will be full of filament you will need to heat this up to allow removal of the nozzle.
So set your printer to preheat PLA, you can turn down or off the heated bed as we are not interested in that at the moment.
Wait for the nozzle to get up to 190C .
Using the correct size spanner and holding the metal block with 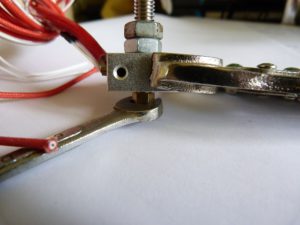

Remember this will be very hot and not to pick it up straight away!!
Don’t put this down on surfaces that can be easily marked by heat. get a pad of paper or something similar to place it on before you remove it.
You can now screw the new nozzle into the heated block and tighten, not extremely tight but nip it up and a little bit more.
My nozzle is leaking why?
There are printers which ooze plastic from all over the heated block, and people wonder why.
Well this is mainly due to incorrect assembly/reassembly of the hot end.
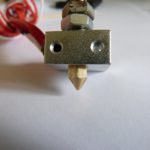
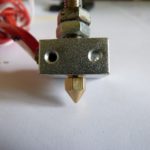
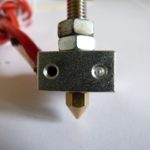
What is supposed to happen is the threaded throat is tight against the nozzle.
What has happened is the nozzle has been tightened against te metal block and the throat screwed down to meet the nozzle.
With the cooling and heating this junction between the throat and nozzle can come loose, allowing melted filament to ooze up the thread and appear at te top of the block, this will over time fall down onto the model. The other place fialment can ooze from is the thread of the nozzle – covering it and adding – where you don’t want it to your model.
The correct way of reassembling your hot end is :
To nip up your nozzle against the metal block, then back it off a turn. So it is now loose.
Thread your throat all the way down onto the back of the nozzle.
Now tighten your nozzle aganst the throat, nip it and a little bit more.
This can be carried out hot or cold, i have not had a problem with oozing when i have done this with a cold heated block.
And thats it. the two are locked against each other and the heat from the block can melt the filament in the nozzle.
How to tell if your nozzle is clogged
If you are getting poor quality prints it can be down to a lot of small details. If you are experiencing missing or no extruded filament as the printer is moving you may have a partially clogged or clogged nozzle.
When you send the printer to the home position, as you will probably stop the print. Go into the extrude menu and get your printer to temperature for the material you are using, then extrude aboput 10mm .
Watch the material come out, if it does and you are lookng for it to come out straight down. Remember if your cooling fan is on then this may cause it to move away from the fan.
If it curls back on itself or look very thin – you can measure the extruded filament and it should be about the nozzle size. Then you may be dealing with a partially clogged nozzle.
What experiences have you had with your 3d print nozzle?
Let us know in the comments box how you treat your 3d print nozzle, if you have found this post useful please share it with people you know who would like it.
Thanks for reading
Phil
