
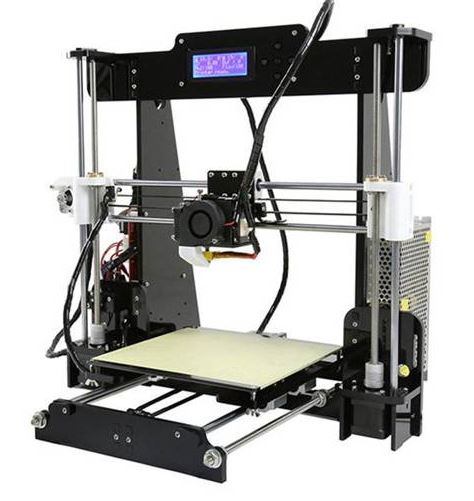
Service Bulletin 1 (SB1)
This service bulletin details how to check and perform Anet A8 bearing replacement on the X and Y axis.
What are the symptoms which require Anet A8 bearing replacement
After you have bought your 3d printer and used it a fair bit you may notice a few strange noises.
Where the print head used to glide across the printer, you notice a knocking noise as it changes direction.
When the bed changes direction there is a visible jump.
Well the main cause for this could be wear on the linear bearings.
How do you tell?
With the printer off, grasp hold of the print head – making sure that it is cold. And try to rock it. If you can feel a knock or see movement then it probably is time to replace those bearings.
With the print bed, grasp hold of one of the front corners. And try to rotate it – like on a turntable. If you feel movement or can see it then again it is probably time to replace the bearings.
What bearings are they?
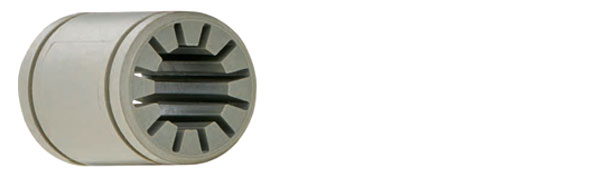
The main type of bearings used on the cartesian printers is the LM8UU type.
I ordered a movement pack – and it came with all of the LM8UU bearings along with a 2m length of GT2 belt, two drive gears for the steppers, enough bearings to replace the idlers and four bearings used for the extruder pressure bearing.
I now have spares if any of the other bearings sound rough – my idler bearings on the x axis are sounding a little clicky- so I will replace those as well.
Anyway back to the LM8UU bearings.
How to remove the bearings.
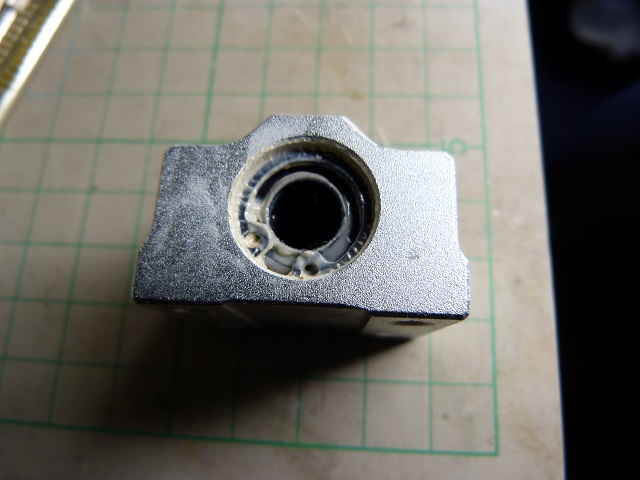
When you buy the kit, these bearings are already inserted into their blocks for the x and y axis.
What you typically purchase as replacements are just the bearings, so what do you do now?
Well the bearings are held in place with clips.
If you remove one of the bearing blocks and look at the end of the bearing you will see a ring almost complete with two small holes. This is the clip you need to remove to get the bearing out of its block.
The retainer is known as a snap ring or circlip dependant on where in the world you live.
What do we do that with?
In the past I have used various methods to remove internal circlips.
I have used screwdrivers, stabbed my fingers and continued on, as this was the only tool I had available to use.
I have used round nosed pliers, don’t use the very cheap ones – they will break!
Or you can get a pair of internal snap ring/ circlip pliers, just make sure you get the internal ones – they close the tops when you press on the handles – otherwise you will struggle.

I did use a pair of round nosed pliers in this case and they did work.
I feel I must warn you that these slips are spring steel and may fly off when you remove them, preferably wear eye protection when carrying out this procedure.
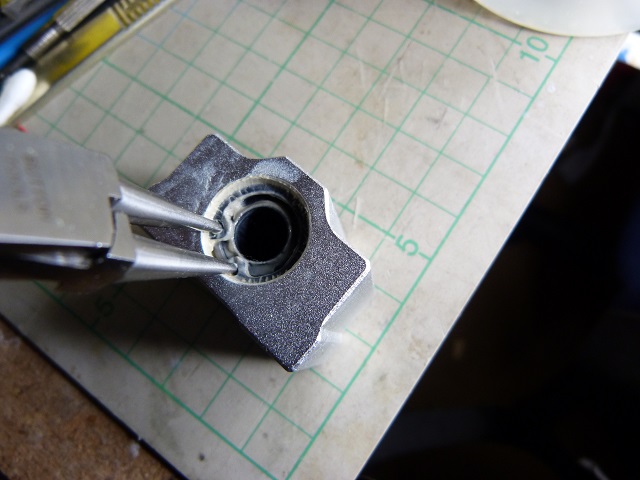
Insert the ends of the pliers into the holes in the circlip and gently squeeze the handles together.
Keep forward pressure on the handles – pushing in towards the bearing.
You will feel the circlip become loose and this is the time when you may lose grip on it with the pliers.
Once you feel that the circlip is compressed enough to extract it tehn gently move the pliers towards you, carry on squeezing the handles to keep the circlip compressed.
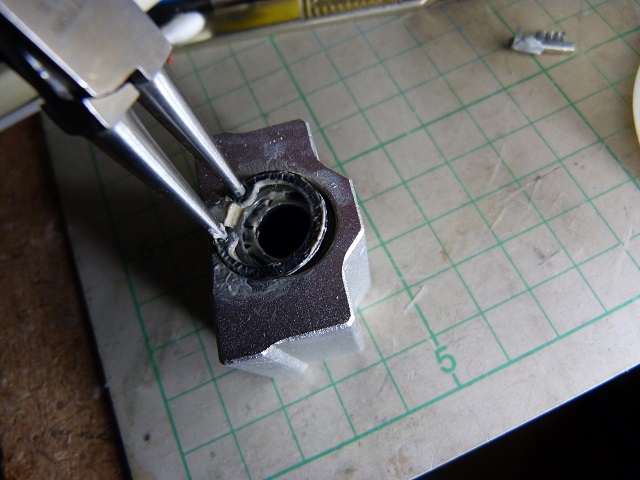
If you can get the circlip out of its groove in the pillow block you can use a screwdriver to lever it out the rest of the way. Rather than struggling with the circlip pliers.
With the circlip out of the way you can use a screwdriver to push the bearing out of the block.
Push from the end which still has the circlip installed.
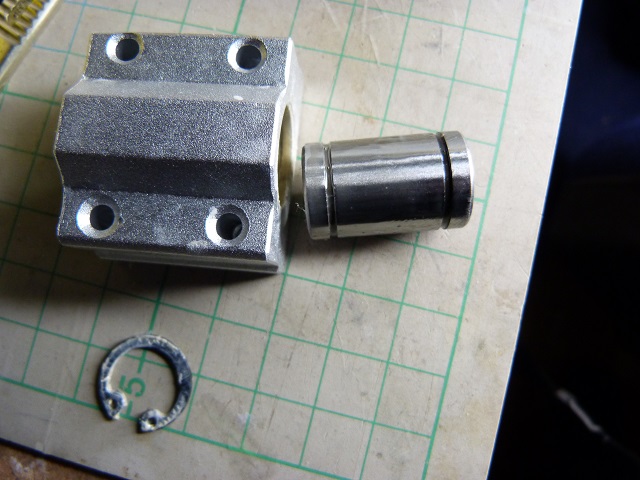
The bearing should slide out easily.
What to do with the new bearing
Clean out the replacement bearing with WD40 and then re-oil the bearing balls.
A light oil will be sufficient to lubricate the balls, if you use a heavy grease then the balls may tend to stick and score the rod.
To oil the bearing you can slide it onto the rod and add a little oil to the rod – sliding the bearing over this area will pick up oil on the balls and lubricate them.
To reassemble the pillow block.
Take the lubricated bearing and slide it into the pillow block – there is no orientation for the bearing.
Use the circlip pliers to squeeze the circlip until it will fit into the pillow block.
Continue squeezing the circlip until it is seated into its groove.
You can move the circlip once it is inside the pillow block with a screwdriver to locate it into the groove.
And that’s it.
Reassemble the rod into the correct location, place the pillow block onto the rod and screw it down.
Once all of the bearings have been replaced on that axis you should notice an improvement in quality.
So every few prints get the oil out and lubricate the new bearings to make them last longer.
Or try something different
Or look into the polymer bearings, which need no lubrication and can even operate underwater.
These polymer bearings will need a short running in period and may be tight to tart with but once they have been run up and down the rods a few times a new layer of lubrication will be exposed and they will run smoothly.
Do they last as long as standard ball linear bearings?
As long as they are not forced out of square the lubrication should enable these bearings to last longer than standard bearings. If they are assembled out of square they will wear out very quickly.
So they are not for every situation, but can be used on the x and y axis of most cartesian 3d printers like the Anet A8.
Thanks for reading, I hope you managed your Anet A8 bearing replacement successfully.
Phil