
How to make your own heat block cover
– don’t let the cooling fan spoil your prints
What Anet A8 mods have you done?
All FFF 3d printers use a similar technology, the heatblock.
This is the way they get the filament from the standard 1.75mm or 3mm down to the 0.4mm to create your model.
The heat block is a lump of metal with a 12v ( normally – there are 24v ones) heater cartridge and a thermistor, to report the temperature.
These lumps of metal are hung below the printhead.
As the filament comes out of the nozzle and bonds with the layer below by melting into it.
The filament now needs cooling before it starts to distort the model.
A cooling fan and nozzle takes care of that.
Depending on where that cooling air stream is pointing it can cool not only the model but the heatblock as well.
This means that the heater has to be on more – or worse not be able to cope with the cooling and the temperature of the block starts to drop.
In the software there is a programmed lower temperature where the printer will not extrude the filament, if the heatblock temperature drops below this then that’s it for the printing, until the temperature rises again.
Unfortunately the software, at the moment is not intelligent enough to reduce the fan speed to allow the temperature to rise again – it may get there in the future, but do you want a fuzzy model or a crisp one?
So what do you do?
Insulate your heatblock.
This has two effects.
One is to heat the block up quicker, as there is less heat loss and to isolate the heatblock from outside influences, namely the cooling fan air stream. You will get a smaller effect with the printhead moving through the air.
What do you need?
Insulation material.
The lighter weight the better.
There is a ceramic paper, which I have just tried. It is good and lightweight, but very fragile. So unless you are prepared to layer it with something more robust I would go with the method below.
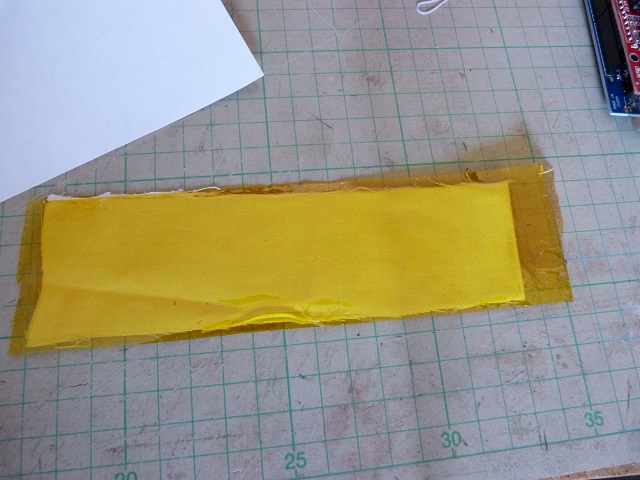
What I found was that linen will withstand a temperature of 230C for ironing.
So I went with this.
How do you do it?

To cover the heatblock you need a pattern.
Most heatblocks are the same shape, some of the newer ones are changing shape, so it is worth just checking the size of your heatblock, and if necessary
Mine measures 20x20x9.8mm
so in a cad program I set out the sizes with the block flattened
and the hole for the throat and nozzle added.
This is then printed out real size.
Kapton tape is attached to the top of the linen and the cutout drawn around.
Don’t forget to put a mark where you want the holes.
Using a suitable punch – mine was 7mm hole diameter – cut out the holes.
How I did it was to get a duster or cloth and wrap this around the top of the punch – where you normally strike it with a hammer.
Placing the cloth on a hard surface – which you don’t mind marking!
Push down and twist the punch. The cloth will stop you from hurting your hand and forms a good handle to turn and twist the punch.
Don’t try to stop the material from turning and you will ‘feel’ the punch go through the material.
Carry this procedure out for the other hole.
Cut around the outline to make the shape of the cover.
You now have a flat cover in front of you.
If you have an assembled hotend, this makes it a little tricky.
You will need to either take off the throat or the nozzle to fit the cover.
If it is on the machine then the nozzle is the one to remove.
If it is still on the machine you will need to make a slit to the outside for the hole the throat goes through.

Push the nozzle through the correct hole and through the correct side.
Fit the cover over the throat.
Screw in the nozzle finger tight.
The cover should wrap around the long side of the hot end.
You may need to adjust – as with anything handmade it may not be perfect – I made a mistake where I cut the holes so moved them ( recut them).
Cut a piece of cotton thread about 60cm long (2ft).
Tie an overhand knot in one end.
Tie another overhand knot and feed the other end through the center, this will make a loop once the knot is tightened.
Pull the knot tight.
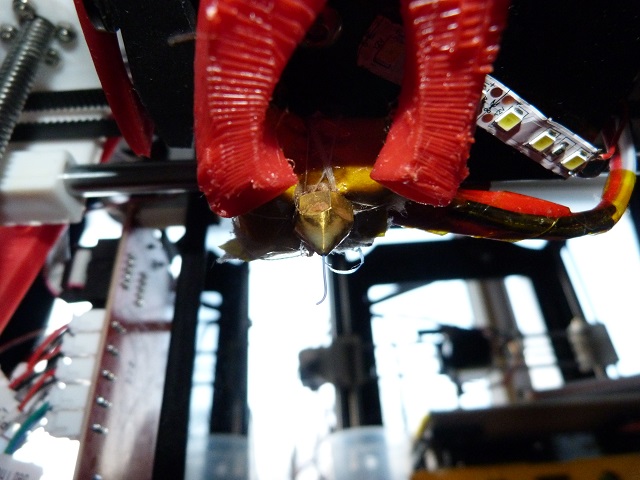
Put the loop around the block to hold the cover in place.
Tighten the loop.
What may happen is that the first end with the knot may slip, but it won’t be able to slip all the way off and will tighten against the original knot.
This is a good knot to remember when tying up parcels as it will hold itself, you can then go through 90 degrees to wrap the other side, just as you will do with the cover for your hot end.
Continue wrapping the cover until you have about 150mm (6 in)of cotton left.
Then the next time around the block feed the end underneath some of the other threads.
Tie this in an overhand knot – ideally this will be done on top away from the nozzle.
I have used a thick thread to show you the knot – I tried to do this with cotton and it proved impossible to show off the construction of the knot properly.
You now have an insulation cover to prevent the cooling fan from dropping the heat and to allow the hotend to get up to temperature quicker.
And you can make one of these whenever you want to.
Just remember to make sure you correctly tighten your nozzle onto the throat.
So finger tighten your nozzle onto the block and then back it out ½ turn.
Screw the throat down finger tight onto the nozzle.
Use a pair of vicegrips ( molegrips) to hold the block and a spanner to tighten the nozzle finally in place.
You have now created a good seal between the nozzle and the throat, this will prevent leakage of hot filament.
This procedure can be carried out with the block cold.
If you find the block is able to move when it is heated up then just nip up the nozzle with the vicegrips ( molegrips) and spanner.
Instead of cotton to hold it you could use kapton tape – as this is designed to be used in hot areas it will be suitable for wrapping around the cover to hold it in place.
So hopefully you can sit back with a smile and be pleased you have another part of the 3d printer cracked.
If you have an easier way of creating the cover for the hotend why not share it with us? or any other anet a8 mods the feel free to share.
Thanks for reading
Phil