Are you happy with your prints from your 3d printer? Could your cooling nozzles on your 3d printer be part of the problem?
Check out what it is for and how it does what it does.
What are the cooling nozzles for?
The FFF (fused Filament Fabrication) type of 3d printer extrudes a thin filament which, layer by layer builds up your model.
To extrude the filament it needs to be heated up above it’s melting temperature.
The filament is then forced onto a build platform and once the first layer is complete, the next is extruded on the top.
The extruded filament partially melts the layer under it to bond together, this bonded plastic needs to cool quickly or the model will distort.
To cool the plastic air is blown onto the extruded plastic.
From a 40x40mm fan the air is directed down towards the nozzle to take the temperature down very quickly from about 200C to 50C, below the melting point of the plastic.
There is another cooling fan, but a lot of people remove it, it is used to cool the top of the throat to prevent heat creep, the situation where the hotend heat travels back up the throat causing a blockage due to filament softening.
In this test i have concentrated on the filament cooling. If there is a request i may come back to the throat cooling in the future.
What have I tested
Starting with the standard nozzle – or a mistral v1.0, a copy of the original.
0.2.. layer height, 20% fill density, nozzle size 0.4mm, no support.
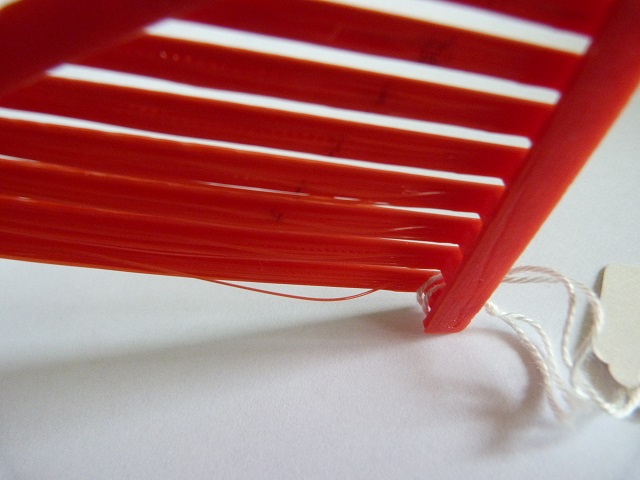
The model was a bridge test piece by skriver, 10 – 100mm unsupported filament.
The reason for this model is that the unsupported plastic is one of the hardest things to get flat without drooping or collapsing. The longer it is the more chance it has of drooping unless cooled quickly and the plastic becoming rigid.
With a second layer being printed on top the first will become pliable again and quick cooling is needed to keep it flat.
Are there others – yes there are plenty with curves, overhangs, bridges and other things – but I wanted something that wouldn’t take forever to print. Some of the test pieces were estimated at over 2 hours – yeah right!
So on with the testing.
With the standard Mistral v1.0 inserted into the cooling fan the print was started.
When the print had finished I waited till the bed was below 40C before removing it, even that was too hot and some distortion took place while it still cooled.
The cooling fan was removed and the cooling duct replaced with the semi circular one. The cooling fan was refitted and the print run again.
The same cycle was carried out for the spriya and the mistral v2.0.
What results did I get
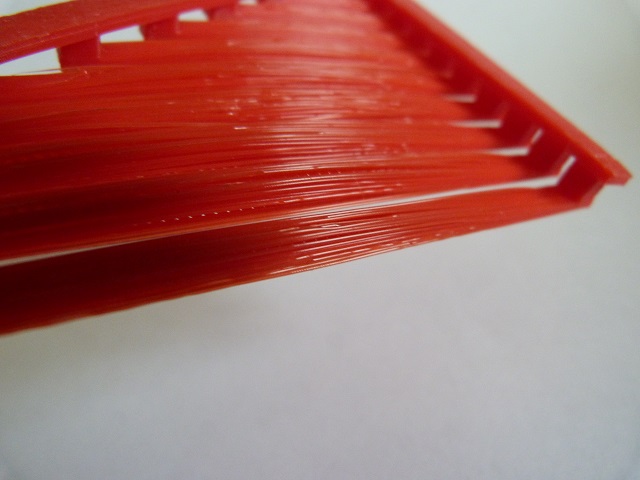
The results were surprising, all of the cooling nozzles sort of passed the 100mm bridge, I thought I would get a couple of complete failures.
The semi circular duct fared the worst with a bit of non bonded filament above 40mm and drooping filament above 70mm. This was operated at 100% speed and the nozzle never dropped in temperature.
The standard nozzle was next., with loose strands above 50mm and drooping filament at 100mm. Again the fan was operated at 100% and the nozzle temperature never dropped.
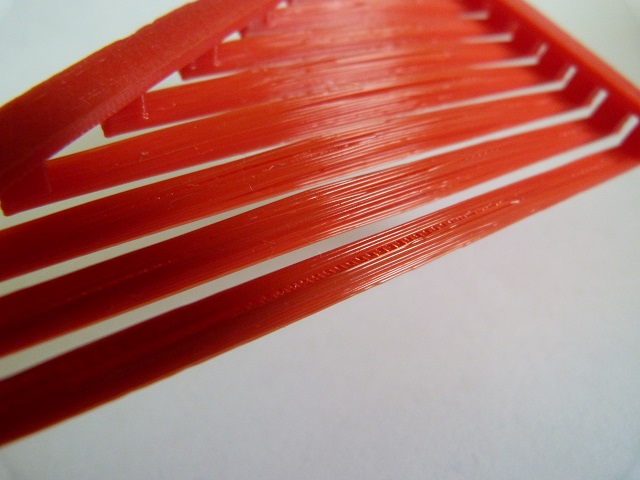
The Spriya was next , with thickening as the bridges became longer but no drooping or loose strands. The speed of the fan was cut back to 65% due to the cooling effect on the nozzle dropping the temperature below the extrusion temperature.
And the Mistral v2.0 being the best, no loose strands and the thickening being less than the spriya. The speed of the fan was cut back on this to 70%, again cooling the nozzle too much.
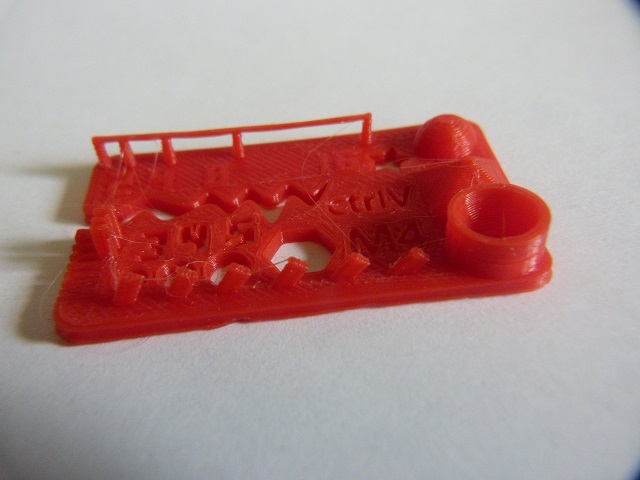
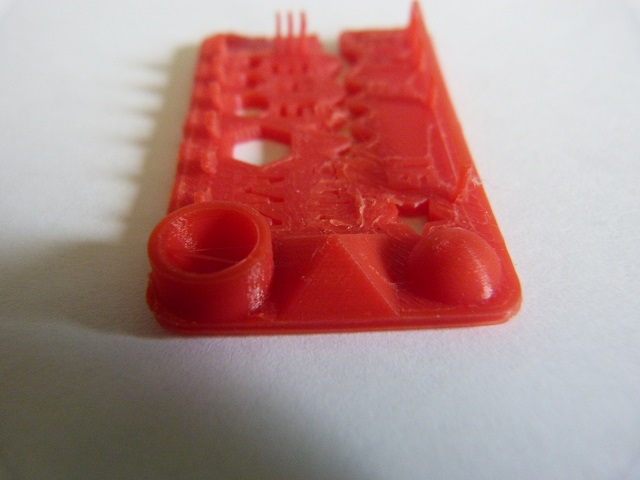
With the mistral being, to me the winner, I went onto print out the test your printer v2.0, again this takes a lot less time than the latest version!
All of the features are crisp – including the top of the pyramid, a known place for overheating. The overhangs are clean with no droops. With the slots in the side, I should have adjusted my Z height a smidgen up as the first layer was spreading too much, but it shows the first 4, below this it is covered underneath.
I decided to reduce the layer height and try a fine print.
The results were good, the hemisphere has smoothed out from the draft mode, the overhangs are a lot crisper.
So which of the cooling nozzles am I using
With what I found with the different cooling nozzles, I have stuck with the mistral v2.0.
The reason for this is that there is cooling in hand, running it at 70% above was sufficient for the 100mm bridge.
The air is directed more onto the plastic being extruded rather than the hot end block, as in the case of the spriya.
Are there any improvements I would make
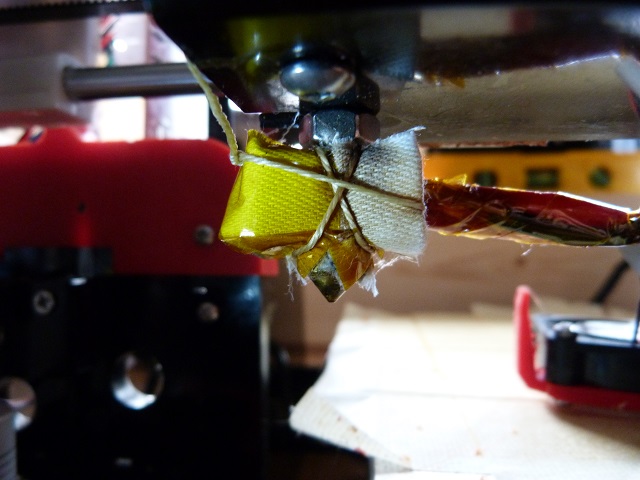
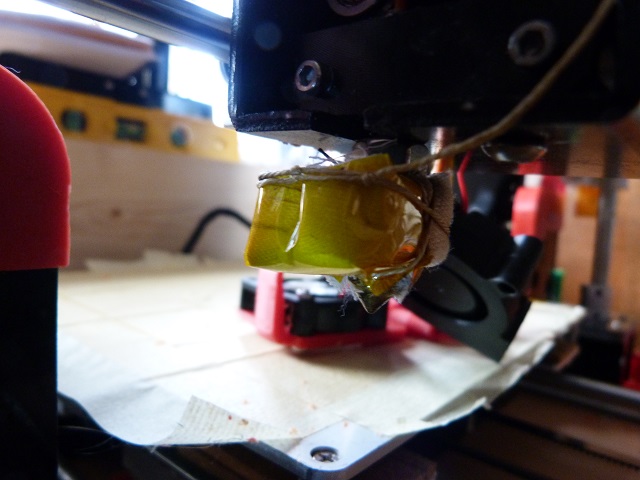
I have made one significant improvement since carrying out this test.
That is to cover the heated block.
Research showed that cotton or linen would stand up to the temperatures that the heated block is getting up to.
So I obtained a piece of denim – from an old pair of jeans, this was tied around the block and the cooling fan run at 100%, the temperature dropped by 2.6C, a massive improvement on what it was dropping to.
I have now sourced some linen and removing the denim found that it was scorched – so I wouldn’t recommend this material. The linen on the other hand, two pieces cut for the block and held together with kapton tape, tied around the metal block with linen thread and the Mistral run at 100%, the temperature drops less than a degree.
Knowing that any small details are going to be crisp, as the cooling air is directed onto the nozzle and cools the plastic as soon as it leaves the nozzle.
Would I recommend this as a mod
yes, but the covering of the heat block is a bit of a pain, but worth it.
I will run a bridge test again, along with the test your printer v2.0 to see what difference it makes to the thickening of the bridges. Whether it blows hard enough to move the filament rather than just cooling remains to be seen.
What would be good is an adaptive system which cools the plastic enough for the next layer, this could be done with one of the low cost pyro detectors on the market, coupled into an arduino and adaptively changing the fan speed as required.
With the above testing will you be printing out a new cooling duct to enable you to get your prints that little bit crisper, or will you stick with what you have got?
What have you got – what do you use and are you happy with it.
So testing cooling nozzles on the Anet A8 has taught me a lot more about the material and the operation of the printing process.
Thanks for reading, share or link to others who may enjoy


Is the additional cover going onto the silicone rubber heatsock? Or did printer in 2017 not have that?
The printer in 2017 never came with the silicon sock – so if your has one of those then you don’t need another cover
Phil