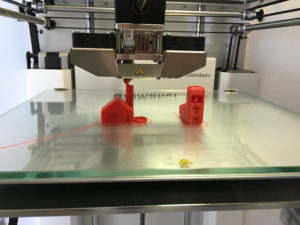
I have now been operating 3d printers for a few years and have got used to creating models – or downloading- slicing and printing. But have recently become more and more frustrated with the Cura interface – so started looking elsewhere.
Knowing that Prusa did their own slicer – originally a slic3r variant (which i have tried..recently)- they have now taken a version and gone their own way.
So is it easier to use, better, more workable, faster, more accurate that cura…let’s find out shall we….
Why a 3d slicer is necessary for 3d printing: A slicer is necessary for 3d printing due to the fact that a 3d printer needs coordinates to send the print head to for it to lay down the molten filament to create the model in 3d from your cad model.
When i started my journey in 3d printing Josef Prusa was making the Prusa i3 mk2, which i eyed enviously at the time.
Not willing to spend that much i settled on a prusa clone from china, which came bundled with cura – the slicing software.

We are talking version 15.xx of cura…the very basic one – but still a very good introduction to slicers…
Following the development of the Cura slicer and their versioning was interesting…now on version 4.xx…this all makes sense.
But version 15 had enough for me to start creating models on my printers.
It was absolutely fantastic.
But i am now looking at the newer versions of cura and seeing all of the parameters you can change under the expert settings and thinking – do i spend more time with the slicer than creating the model or actually printing it.
So I started looking around at other slicers to see what they could offer…
I have looked at Kisslicer – i now use their cal model as a test.
I looked at slic3r, and found that prusa have taken a version and gone in their own direction.
I do like slic3r and may come back to it, but it seems a little less advanced now that the prusaslicer.
I did look briefly at simplify3d – but with a slicer costing more that the printer and the slow updates, reported all over the web then i will give this a miss at the moment.
So i thought i would concentrate on the Prusa slicer.
If i was starting now – what would i advise people to start with – i reckon i would go with Prusaslicer or slic3r rather than cura.
Why…i think just a little less confusing and has more features easily accessible.
That being said, i have only worked with it for just over a week -and have had a few issues.
This is the reason for this post.…to prevent others from having these issues and to set it up right from the start.
Why look at prusaslicer
Looking at what you can do with Cura, and i know that a lot of the features are now available in there.
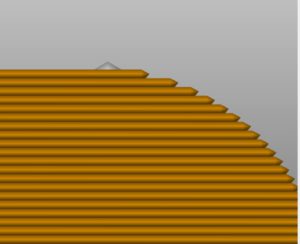
I found that creating curved tops was always a problem.
As you go up the curve, unless you had chosen a fine layer height then you started to get a coarse stepping at the top.
The other part is that when making things like the x and y belt tensioners – i had a couple snap due to the amount of infill i added, but didn’t want to add it al the way through the model.
Finding that slic3r had adaptive slicing and you could create a layer stack, not just a hard step for the layer change made me smile.
And as i say after finding that the prusaslicer had this option along with the variable fill – i had to give it a go…
First go with Prusaslicer
After using Kisslicer and the introduction wizard to setup the printer, i found the Prusaslicer a bit awkward.
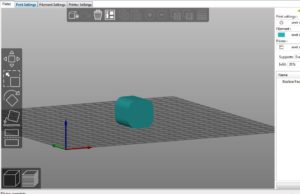
I am sure it is supposed to have a wizard that starts when you first install it, so maybe i have installed and deleted it in the past, but nothing came up.
I do like the fact that you get the four tabs open on startup, with slic3r you have to open them yourself.
I didn’t bother creating a new printer for my anet clone and used an i3 mk2 as a printer.
On slic3r when you add a model it appears in the center.
Ok, but i want to print it front left corner, and until i found that tick box in the file -preferences it would always snap back to the center…..
The Prusaslicer comes with that box unticked, but it is under configuration preferences if you want the model to stay in the center….
First impressions
Looking at it’s simpler interface from the ( to me ) now cluttered cura one, i felt that it was laid out better – similar to the old cura.
But with four individual panels it feels lighter and has more breathing space.
Loading up the Kisslicer model it appears in the center of the plater (their name for the bed).
But is easily dragged to the front corner (where i usually create my models).
The graphical interface is pretty good – with all the features having a mouse over tip to tell you what they do.
I like the feature of setting a face down on the print bed.
And the fact that it is very easy to cut the model into pieces.
Right clicking when you have selected the model brings up another menu with a host more features.
More Features menu
One of the features i was looking at was to add more infill in places where the model maybe more stressed and not everywhere.
Well this is accessed in the right click on the model menu.
If you add a modifier you then have a selection you can modify within the shape you pick.
These are box, cylinder,sphere and slab.
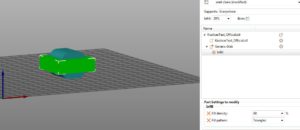
You can easily resize the modifier and placing it manually in the graphical window can be hilarious, or a pain.
But help is at hand in the right hand pane with XYZ coordinates.
Clicking on each shows the arrow in the direction of movement.
I was a bit confused with these as they don’t seem to follow convention.
The Y axis going up and down, the x axis left to right and the z axis front to back.
So the x axis is the one in the right direction, the other two are hopefully just wrongly labeled.
But in the right hand pane if you now right click on the little gear you can add the modifier – in this case infill and set it to what you want – i went up to 60%.
And then reslice.
Using the lower slices view in the left pane you can drag the layers slider down to see the effect of adding more infill and make sure it is what you want.
I think this feature is fantastic – with the only problem, even in the more settings the only one i wanted to use was not there – temperature.
I will dig more to see if it is an easy way to create a temperature tower, but i can see that characterizing the printer can be accomplished using most of these parameters.
One more thing about the slider – don’t click on the little plus symbol unless you are ready to change filament.
I must have clicked on it accidentally as the first model i sliced to test it printed all the way up and stopped on the last layer and unloaded the filament- not an expected result…..
So i looked at the G-code in craftware, i thought the listing said M500 ( store settings in eeprom), but i was mistaken and it was M600 (filament change).
But where….
When you click on the little plus on the slider you get a color change created.
There is no callout for this, there is no obvious deletion (especially when it is the final layer), but setting the slider to the layer does give you the option to click on the little x and delete the color change ( about three hours later and an internet search…..) – this has been the only thing i have struggled with so far….
Another excellent feature – especially for any rounded top figures you want to print is adaptive layer editing.
Rounded tops more accurately
Early slicers allowed you to slice at a layer height, and only one layer height.
Now this is ok, with large layer heights giving you shorter print times and lower layer heights longer print times.
Or looked at another way – large layer heights a coarse finish and low layer heights a fine finish.
So what if you have a lot of straight sides that could be finished with the larger layer height and a rounded top that really needs the lower layer height.
In the past you would have to suffer extremely long print times just to get the finer finish at the top.
But more and more slicers are now adding a feature to allow you to have adaptable layer heights.
Not every printer can handle this, so it is worth testing yours – i can’t see why not as they are dumb machines that do what they are told ( well most of the time….).
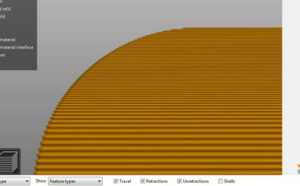
At the top menu the last item on the right is the variable layer stack – this is only available when in model view (this confused me as i would have thought it would be in sliced view).
Once you click on the layers menu then you get a view to the right of the model of the layers.
Using the mouse ( left and right buttons) to increase and reduce layer heights at the different heights of the model you can reduce the stair stepping at the top of the rounded parts – zooming in can show what effect this has – as can seeing the change in color on screen.
And printing it out it does really reduce the large steps if you choose a fast print time for straight sides.
How easy is it
It has been relatively easy to transition over to the prusaslicer.
There have been a few hiccups, as you would expect – the layer change was the worst one so far.
But the added features and simple interface allows you to start to explore the features instantly.
I did set it to expert control settings as soon as i jumped into it, but maybe the advanced would have been better.
I did click on the simple and would find these too limiting, but anyone starting out would have the very basics to adjust and hopefully the model would be passable.
Overall impressions
I think i am a convert.
I will still use cura 15.xx as a fast chuck it on there and see , but maybe with time even that will stop.
Would i put all my eggs in one basket, i will still look at the different slicers to find what advantages and disadvantages there are.
But most people who want to print models don’t want a steep learning curve, they want the model printed now……
There are a lot who seeing the page for setting the parameters of the printer in terms of speed and acceleration and jerk who would have skipped back to cura.
I did wonder where i would find those and whether they could be used to tune the printer a bit more.
On the Anet a8 i found them under the control ->motion menu and noted those down.
It does work without you setting those up as it will rely on the printer not exceeding its operating parameters coded in to prevent damage.
I will be doing more work on this slicer and hopefully will be creating a series of tutorials showing what it can do.
I will go back to cura version 4.x and see if the same features are in there – if they are ten maybe i will create tutorials on both….
But i hope you will explore the features of prusaslicer and maybe the forerunner slic3r if you are starting to get a bit overwhelmed with the number of elements you can change within cura…
What are your views – what do you think of Cura, prusaslicer or slic3r – let me know in the comments below
Thanks for reading
Phil
Cura seems to be a more straightforward slicer to use right out of the box, but where it sucks is that it gets real easy to have your configuration messed up when it is synced to the cura cloud. It’s a matter of every week some sort of issue nuking my config.
Isn’t that the truth Jim, as soon as software goes into the cloud i worry that it can be taken away from you without warning…
and, as you say it can get messed up by their updates….
i still prefer to download and manually update ( maybe i am old fashioned) but when you need stable software it may be the best way to go…
I’ve yet to use the cloud version of Cura…i still work on an older version….
What features would you like to see in an ideal slicer Jim…