This Anet A8 3d printer review has been done after buying and building it, this is my third printer build – first a prusa clone, second a 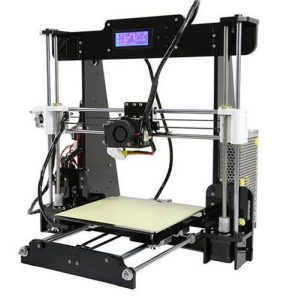
The 3d printing market is starting to hot up now (Aug 17). The introduction by XYZ printing of a full colour 3d FFF printer using inkjet technology along with FFF will open up the market, but at a cost of £3k few will be able to justify it.
So what are the alternatives if you are looking to try out 3d printing?
You can buy a ready assembled model.
You can buy a kit to assemble.
You can send off your model for someone else to produce.
If you want to start printing straight away when you open the box then the kit printers may not be the right choice for you. The down side of this is the added expense of buying a printer which you may not be able to upgrade or repair yourself. But a lot of people just want to print, nothing wrong with that.
If you prefer more of a challenge and are interested in seeing what is behind the covers of the ready built printers then a DIY kit maybe for you. Be ready for a few challenges, mechanical and electrical as a lot of the build manuals leave a lot to be desired.
Sending your model off for someone else to produce allows you to experiment with different type of filament and different technologies before deciding on one you want or can afford.
My approach is to see what is behind the technology before it gets too complicated to build it yourself.
I looked around and found a lot of support for the Anet A8 so decided to take the plunge and buy a cost effective DIY printer.
This is what I found.
I ordered the Anet A8 3d printer kit from gearbest.com and waited.
Knowing it was coming from China, I knew I had a few weeks worth of waiting.
At the same time I ordered a delta printer kit. A Renren 3d delta printer from alibaba.com.
They both arrived at the same time. Only two weeks later.
Having already built a cartesian printer I built the delta printer first. See more here.
A few problems on the delta delayed me building the Anet A8.
But I recently got around to it.
The kit itself is supplied in a box 51x31x21cm (20×12.3×8.3 in), inside you will find a well packaged kit, laid out in three trays.
There is very little paper documentation, but supplied manuals on a micros SD card with a memory stick converter are very useful.
The main frame of the Anet A8 is black acrylic. You will be stripping 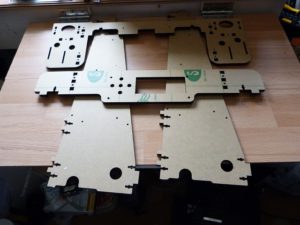

Using screws and nuts the frame takes shape, before the addition of the motors, endstops and guide rails.
The build itself is relatively straightforward – if you have built one before. If it is your first one you may struggle with te diagrams presented in the build manual. So I have produced a build manual on this site to complement the manufacturer’s manual.
The controller board is a single board, with no plugin modules. All of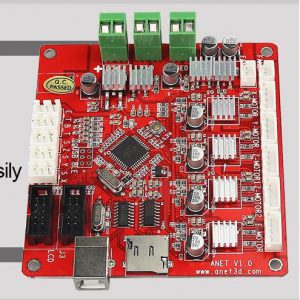

The wiring from the various motors and endstops are all labelled and once plugged into both ends, gives the user the confidence that the right parts are fitted.
There are a few tricky bits – getting the belts tight enough and locating the smooth rods. But take your time and you will end up with a printer you can look at and know you built it.
Wiring up the mains and switching on for the first time are always a nervous time, and a quick second check that everything is in it’s right place doesn’t go amiss.
First switch on had the screen showing that it indeed was a 3d printer.
A few quick tests, end stops and motor direction, detailed in my build posts, and you can confidently click the home all menu item.
To hear the buzz of the motors and then the click of the end stops then silence is always satisfying. Knowing that you have wired it up correctly and all of the mechanics are in the right place. Very satisfying.
But it is a printer – so we want to start printing.
On the SD card Anet have supplied some models.
You may have installed the Cura software, along with the repetier host controlling software. With Cura you can examine the model and it will show how long it will take to produce.
It may be nice to pick the pyramid, but when you realise that it will take over 6 hours to print and take 22m of material – not supplied, then you have to rethink what you are about to print for the first time.
Take your time and go through the levelling process, then go back through it. It may be boring but get this right and you will lessen the main problems people have when first 3d printing.
The example chess piece, the box and the figure are the sample files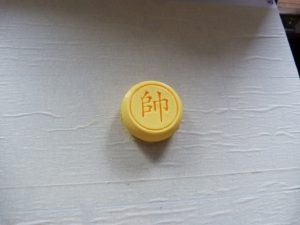

The print results are fairly good without any major tweaks.
The printer itself will create its own tune as it is printing, some like the discordant notes – while others cannot wait for it to stop.
As there is no removal tool supplied you may struggle getting the print off the heated bed. Don’t forget to wait for it to cool down below 40C before removing the model – otherwise you may end up bending it.
I used a Stanley blade to lift the model off the tape covered build platform, I ended up cutting into the tape after the tenth print and had to replace the tape.
Buy some 1.75mm PLA filament while you are waiting for your printer to arrive, this will reduce the frustration when you use up the 10m of filament supplied.
Buy a couple of colours and add to these when you need more.
This printer is capable of printing most of the filament available today. With it’s heated bed capable of reaching 110C and the nozzle capable of reaching 275C – you should be able to print nylon. I will be trying this later on.
With a build volume of 220x220x240mm (8.6×8.6×9.4in) it sits in the mid size 3d printer range. Most of us will not be using the whole of that volume due to the time taken for the prints. The largest I have printed is 128x128x134 and this took 9 hours along with 27 metres of filament. The print was mainly hollow – the rotor for an escher windmill.
The speed of this print was at 50mm/sec, the manufacturers claim of 100mm/sec would be nice to achieve but to ensure that the print turns out well you will need to slow it down, maybe even more than this to 30mm/sec. You will be thinking ‘ come on hurry up’ but speed it up at your peril with massively reduced surface quality.
As you know all of these model are printed layer by layer and the smaller the layer the better the quality of print. This Anet A8 model has a claimed layer height of 0.1mm (100 microns) minimum, but with the Z axis accuracy claim of 0.004mm (4 microns) I reckon in the future I will try even smaller layer height, but not on anything too large – or it will take forever.
Connecting the printer up to the computer is by usb lead. The usb connector is a little difficult to get to and may cause strain to be placed on the controller board, I will be adding a modification soon to reduce this strain, along with another for the micro SD card.
So after building it what do I think of it.
I have used the test your 3d printer v2 rather than the standard 3d benchy. I like the benchy but in this case the other test piece is 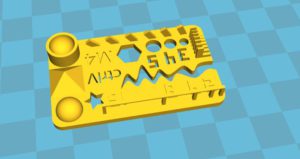

Using the supplied Cura setup I found that there was too much filament being extruded along with too high a temperature. It maybe that the hotend thermistor is high or low in resistance. Taking the temperature down to 190C and the flow to 85% has cured the stringing, along with more retraction length.
The unit itself appears to be very capable, and comparable to units two or three times its price.
The print quality is good, not excellent, but good for most beginner printers.
The speed of the unit is a bit slow, but with small tweaks it may increase to the magical 100mm/sec.
Would I buy another Anet A8 3d printer?
I probably would, I will need to make a few mods to the frame and belt system but overall it is a capable printer, for beginners and intermediates.
People who want to build their own printer then maybe add some upgrades to improve it.
The Anet A8 can be stripped and rebuilt in an evening once it is built, along with setting up time, once experienced. This means that any mods you do can be installed in one evening, with the printer back up and running the same evening.
Anet A8 3d printer specs
- Type : FFF ( fused filament fabrication)
- filament size : 1.75mm
- filament type: PLA,ABS,most of current filaments
- print volume : 220x220x240mm (8.66×8.66×9.44 in)
- printer size: 520wx450dx460h mm(20.5×17 3/4 x 18 in)
- nozzle : single 0.4mm
- layer thickness : 0.1 to 0.3mm
- interface : USB, micro Sd card
- print speed: up to 100mm/sec ( typ 30-50mm/sec)
- XY position accuracy: 0.01mm ( 10 microns)
- Z axis position accuracy: 0.004mm (4 microns)
- aluminium heated build platform
- metal gear filament extruder
I would give it a solid score of 70/100 as a beginners printer.
And an 80/100 as an intermediate printer.
Why the difference – well to me the printer is able to be improved and learning about what is required for improvement is part of the course of DIY 3d printing.
So that is my opinion of the Anet A8 3d printer.
I hope you have enjoyed the review and are now thinking of buying one.
It can be obtained from Amazon
it is now more prudent to go for the Creality Ender 3 as this is still available – the anet has now disappeared.


Anet A8 Desktop 3D Printer Prusa i3 DIY Kit only $148.99 with coupon “A8SUPER”
Many thanks for reading
Phil
