When designing for 3d printing what do you need to take into account?
Overhangs

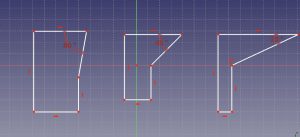
All additive 3d printing material will have a limit to its self support. Typically angles under 45 degrees will require support. Overhangs printed away from the build platform will need support. This can lead to a lot of cleanup if the model is printed the wrong way up or a lot of wasted material.
The ideal is to limit overhangs. Or get a dual nozzle printer, where one of the nozzles can be for support material.
If you start a print with a flat surface then you will get good build plate adhesion. With the stability this brings you will get good print quality.
If your model has a small contact area on the build platform then you will need to have a large brim or support material area, this will lead to poor quality printing within the support material area. So when you are looking to place your model onto the build platform ensure that you try to get the largest area of adhesion on the platform without compromising the models appearance.
Model errors
Your model may look good on the screen, and even spinning it around you may get very excited at the prospect of printing it out. But these models may not print because :
Primitives have been combined incorrectly,
or the model has been exported incorrectly,
or other issues within the model, such as zero internal wall thickness or open meshes.
You need to determine whether the model will be able to be printed. Using a program like Netfabb or makeprintable – you will need to sign up.
After running your model through one of these types of programs you should be able to print it.
Clearances
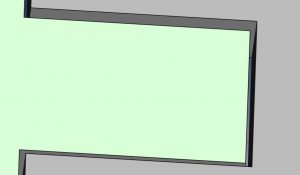
Detail or wall thicknesses thinner than the nozzle diameter will not print in the X,Y axis.
If you have a 0.4mm nozzle installed then if you try to print a wall thickness of 0.3mm, it will not print and may be ignored by your printer causing all sorts of problems.
Anything printed in the X or Y axis requires at least one nozzle diameter.
Tolerances

With additive printing you will find that the model printed will be slightly larger than the model on screen. This can leads to problems when items are designed to fit together and move.
You will need to factor in at least half a nozzle diameter clearance on both inner and outer surfaces.
If this is not taken into account there will be a lot of sanding to be done to get the parts to fit- or reprints!!
With cad programs like Cubify Geomagic you can set the tolerance gap and ensure that there are no collisions between parts. This will almost ensure that parts will fit.
Model size
you need to ensure that you can print the model with your printer. It is no good designing a massive part only to find that you will not be able to print it. The alternative to printing large parts in one piece is to break them down and fit them together.
These parts will never be as strong as a single piece but it does give you the ability to create large models.
3d printers are evolving quickly and build volumes are increasing. There will be a maximum size either through the physical size of printer you can fit in your home or through the accuracy of the technology versus price. Typical build volumes are 250mmx250mmx300mm.
So what will you be designing for 3d printing?
When designing for 3d printing what other factors do you take into account?, share your design considerations with us in the comments box below
Thanks for reading
Phil
