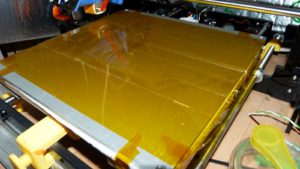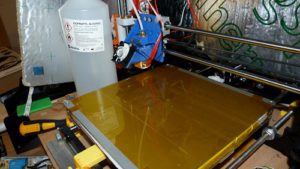
Do you want a smooth bottom to your prints, whether they are PLA or ABS or TPU. Well it is worth finding out how to apply Kapton tape tape to your print bed to achieve this.
Applying kapton tape to your 3d printer bed: Using a high temperature covering on your bed to allow your prints to stick will help in two ways – it protects the bed surface and gives you a smooth bottom to your print.
Applying Kapton tape to your printer build plate
Kapton tape or polyimide tape as it is more generically known (Kapton is a trade name of DuPont) is a high temperature tape, mainly now used in the electronics industry.
You have seen flexible pcbs…well they are made out of polyimide with copper tracks on them. You can solder parts to these as well, that is the sort of heat this material can take…
Using it to cover the print bed will allow your prints to stick to the surface of the tape and make them adhere while printing and when cold can help remove them.
Remove all the old surface adhesive
To start this process you need to get rid of the old surface coating .
What i am doing is replacing the surface on my aluminum build plate.
I know a lot of you have gone to a glass plate – and the process is the same.
So with IPA, or other solvent remover get rid of all of the old coating and adhesive.
You have probably dug into the old coating when trying to get prints off the bed—i know i have, and cussed a bit when doing it…
You try and stick it back down, but it never really sticks and gets caught in the first layer…
Once the print bed is clean
Once all the old adhesive has been removed then use a final wipe of IPA to get rid of any grease from the fingers or residue left from adhesive removers.
Plenty of water and soap
Depending on what you are like with putting screen protectors on your phone you may be able to get away with not doing this step, but most of us need to do this.
Get a spray bottle with water and a bit of dish soap – it can be cold water.
Making sure that you are not going to get anything wet that shouldn’t – and make sure your printer is off if you are working on it.
Spray the water liberally onto the surface.
Different widths of Kapton tape
There are different widths of polyimide tape and different approaches for applying it.
I have 50mm width ( 2 in) and wouldn’t go under that width, but you can go up from that to over 200mm (7.8 in).
Why the difference….well you can cover the bed in one piece rather than strips.
But before you rush out and buy the wider one, think about how you use your printer….
Do you print mainly small items, or are they large and cover the whole bed.
If they are small then it maybe worth going for the strips….
My reasoning is that i can replace a strip and the rest of the bed is fine, if i use the whole bed in one i have to replace the whole surface at once….
It probably makes no difference in the end, but i dislike wasting things…
But back to the now drying bed….
Cut a strip longer than the bed
Decide whether you want to go side to side or front to back.
My preference is front to back as i don’t remove the bed.
With the bed covered in the water and soap spray – make sure you smooth it over with your hand to ensure all over coverage.
Any parts not covered in the spray will allow the tape to stick to the bed immediately – this is not what we want.
Cut a piece to the right size plus 50mm or so (2 in) – this way you don’t have to position it exactly.
Make sure the sticky side does not touch anything, picking up any dirt or dust as this will make an impression in the bottom of your prints….
Lay it onto the bed in approximately the right position.
If there is enough water the tape will be able to be repositioned by hand – you will be able to slide it around.
If not it will attempt to grip – you can remove it easily at this point and spray more water onto the bed surface and try again.
Right to the edges
In the corners of the bed are adjusters.


Do you cover them or not – well i suppose it depends on whether you need to get to them and plan on printing to the edge of the bed.
But remember if you are using 50mm width tap – four strips of this are 200mm and if your bed is 220mm then you will be adding a thin strip down one edge….
Or miss about 10mm either side – which is how i do mine.
This accounts for the adjuster screws…
So sliding the first piece towards the edge and getting it as parallel as you can by eye leave it there.
Spray some more water onto the bed and cut another strip to go next to this.
Lay the next strip onto the bed next to the first strip, you should be able to slide it to butt upto the edge of the first.
But don’t force it into the edge as this may cause a ridge and a thickness which will interfere with the first layer printing.
Spray, cut and place the other pieces onto the bed.
Squeegee the water out
Now comes the interesting bit – getting the water out from under the tap to make it stick to the bed surface.
Using a squeegee – an old credit card, screen protectors come with them, or even car body filler ( but not used ones with filler on please….).
You can use anything that will not scratch the surface and is relatively soft and flexible.
Start at the center of one piece and work towards the outsides.
Have some paper towel available to mop up the excess as it is squeezed out from under the tape.
At any point you see a large air bubble or crease appearing then stop and lift the tape.
Lift out the bubble or crease – spray with water and reposition.
It may take a time the first time you do this and you may get a few small bubbles left – but as with the screen protector you can chase them around to one place and towards the edge of the bed.
Do this for all the strips.
Heating the bed for the first time
After squeegeeing we need to make sure the last traces of moisture are gone before printing on the surface.
So now reinstall the bed surface if it was removed from the printer.
Make sure all the excess moisture has been removed from around the edge .
Some people trim it to fit exactly to the bed – it all depends on the type of person you are.
Personally i tend to leave the edges overhanging as they are useful when you need to remove it in the future.
As long as they are not going to interfere with the movement of the bed – or anything else with the printer then what’s the problem.
If anything i wrap them down the sides of the bed to reduce heat loss from there…
So now switch on the printer and selecting the bed temperature heat it up to about 70C.
And wait…….
Go have a cup of coffee and leave it for about an hour.
What you will come back to will horrify you – all those bubbles.
That’s where in the last stage if you get almost all the moisture out from under the tape it lessens the impact of this stage.
With the squeegee start at the center of the strips again and move any air bubbles out towards the edges. again with it in strips it is easier to get rid of the air bubbles.
Group them together to make larger bubbles.
If you cannot get these to the sides of the tape you can pop with a very sharp pin and force the air out (smallest hole you can so only just pierce the tape – a lot won’t like that stage but it does work if you can’t move the air out to the sides.
And you should now have a bed surface covered in Kapton tape.
Preparing for printing
So if you are going to print ABS, then you need to cover this surface with the ABS juice ( acetone and bits of ABS dissolved).
Or spray on hairspray to make it adhere better.
Or if it is PLA or TPU you can try it bare.
Sometimes the PLA has trouble sticking to the polyimide, if that is the case a little hairspray ( when the bed is cold) will help it adhere.
Cleaning the surface of the tape with IPA will remove any grease and again help with adhesion.
As will increasing the flow rate of the first layer – but watch out for elephants foot.
Once you see the shine you get when you take the print off the bed it will make you smile and think you never want to use a different surface again…
Until you cannot get your prints to stick and…..
Removing your prints
Once you have printed your model you will be eager to remove it.
I don’t blame you, you are excited to see what it looks like.
But be patient.
Make sure any item you use to lever up underneath your model doesn’t have any sharp corners, these can dig into the surface covering and rip it.
Just moving under the base a little and then using the scraper as a lever can lift a lot of the model up.
What i find is if this happens go around the other sides and do the same rather than just lifting the print from only one side helps preserve the bed coating.
Abs still warping
If when you print abs you still find it warping – especially on the corners try using prusaslicer or slic3r to add mouse ears on the first layer.
You could even go for a skirt that has a height to prevent draughts from around the model. This is something i will try and report back on once i have an enclosure built.
Printing PLA onto polyimide tape
I have found it very hit and miss having PLA stick to the Kapton tape.


Even with the bed heated to 50 or 60C it still just drags the initial lump around.
You almost want to extrude a bit of filament then stop the print head and press it onto the bed to anchor it before starting your print.
This is something i will try and remember to look into, once i get the hang of changing the gcode at the start of the print.
But the finish you can get – especially if it not over any of the joints in the tape is mirror like and worth the hassle.
It is almost worth printing the bottom as the finish surface in some instances.
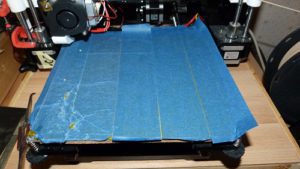
I now have started adding blue painters tape over the top of the kapton tape to guarantee the prints stick.
If i was good i could have a strip of blue tape where the model start printing on the brim and the main model on the kapton tape…..something i could experiment with…
Well i hope you do try using the Kapton tape for a surface finish.
Let me know in the comments whether you have a different method to apply it and i will try it.
What else can you use kapton tape for
As you use the cooling fan to cool the extruded filament you also have a chance of cooling the hotend block.
Doing this will cause the heater to be used more often than it should be adding stress to your power supply.
Covering the hotend block in kapton tape will give it at least one level of insulation – the better is to use the cotton insulation – which again is covered in kapton tape to secure it.
This way you will find that when you activate your fan – especially if you go straight for 100% – it does not thermally shock the hotend block.
Can you repair the surface
If you do happen to dig into the surface then the chances are high that you will rip a piece out of the tape.
Can you repair it.
You can try to stick it back down or you can but a larger area out of the tap and splice a piece in but the next time you print over the splice it will pull off again.
So if you start to rip it up then it is time to replace it.
This is where using the strips can win over the one piece – you just replace the strip that is damaged.
I have a glass plate i don’t need kapton tape
I know that the glass plate is a smooth surface, but if your print sticks too well then you may have another problem i see reported al over the web.
That of the print ripping a piece out of the surface of your glass plate.
Then this needs replacing.
If you cover it in kapton tape at least you have another interface to take the pressure off the glass surface and prolong its life.
Which types of glass plate is this more likely to happen with – well anything that is hardened may become brittle to the point of fracturing.
Whereas softer glass this may not happen as readily.
