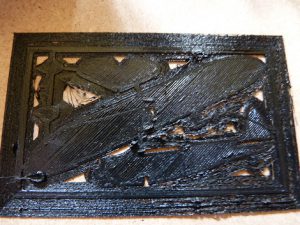
I have not had my 3d printer for long but it is starting to annoy me. Not printing properly, blobby prints. Not adhering to the base plate.
When stationary and up to temperature I pushed the filament through the nozzle – yes it’s coming out. So why is it not printing properly?

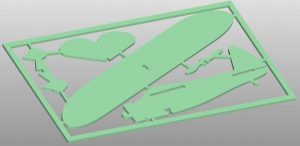
Trying a low profile project, howard dg-15, I failed to print it a couple of times. I had tried to reset the z axis, with no joy. I tried increasing the temperature in case the hot end was being fan cooled too much, nope. So I tried increasing the speed of the extruder nope, I started to get molten material at the top nut of the extruder. Thinking this through I reasoned that the material was too molten and back pressure was forcing the material out of the top of the extruder.
So this is it is it! Either I get beaten by it or I have to sort it out!!
Being an ex-engineer the latter sprung to mind. this post is about my experiences of how to clean 3d printer nozzle.
Ok! so the x and y axis are working correctly and the z axis works – I’m not sure that is set correctly but lets roll with it.
So that brings us to the extruder. Why would this not be working correctly?
Heating the extruder up and removing the filament showed that the end was thickened. Cutting this back, reinserting it and pushing showed the material skewing off to the side instead of coming out straight!! ok so I know this is a sign of a dirty nozzle.
Now the strip down I was trying to avoid.
Gathering tools around me I started by removing the lower bracket of the extruder stepper motor. This allowed access to the top and bottom of the hot end.

The nozzle by this time was covered in black melted filament!! yes it’s black filament I am using.
Using a scalpel to try to remove as much as possible I resorted to turning the machine on and setting the preheat pla to 50C.
Cutting away at this temperature made the job easier.
Using molegrips on the aluminium housing for the heater and a correctly sized spanner for the nozzle allowed me to see that there was a buildup of material at the rear of the nozzle.
Cutting this off with the scalpel the next problem was to remove the material inside the nozzle. I remember reading that you used acetone to dissolve the material for a finer finish, so out came the other half’s nail polish cleaner. Not quite pure but close. Into a small glass jar it went.
Now how to remove the extruder feed the nut was also covered in the molten filament, so heat on and scalpel to the rescue and now I can see the nut properly.
Using a spanner I managed to remove the feed tube from the heater block. Great so how do I now remove the nut from the tube?
Adding two nuts at the top of the tube and locking them together gave purchase to try to undo the lower nut – nope it’s not moving.
Winding it back into the heater and switching on allowed the tube to come up to temperature.. unscrewing the tube again allowed me to remove the nut. The thread was covered in molten filament.
Turning the feed tube over and screwing it back into the heater block It met resistance. Great so the threads in there are covered in filament as well.
Using a socket head bolt I managed to feed it right through the block. Then I tried the feed tube again. Still tight. I had to screw the socket head bolt in and out a few times to clear the thread enough to allow the feed tube in by hand.
Back to the nozzle. Removing it with tweezers and drying it there was very little removal of the filament in the acetone. Hmm what now.
Picking at the back of the nozzle with a scalpel showed that the filament had softened.
So how do I get this out?
Thinking it through I started to use a pointed needle file. Twisting it into the plastic in the direction of the teeth. With the brittleness of the file I can see where it’s going.

So what else can I use?
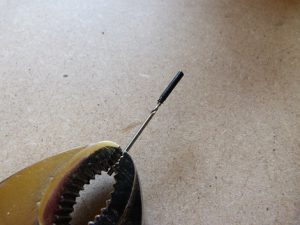
Well a drill bit will fit, trying a 1.5mm drill bit I was not able to twist it into the material. Going down to a 1mm drill bit I was able to hold this in a pair of molegrips and securely drill it into the material. Grabbing hold of the molegrips and pulling back I was able to remove the material in one piece. I found that if this doesn’t work then leaving the filament to harden and the acetone to evaporate will allow the drill bit to bite, making the removal of the filament easier.
Great so how to make sure it is easier next time? A polished surface will not allow the material to stick as much as a rough surface so if I polished it it may be easier next time to remove the material.
Ok so….

looking around I spied some wooden toothpicks. About the right size, yep they fit with a little gap. So go find the metal polish. Liquid polish not a paste we don’t want to leave any inside to block it up again!!
Rubbing some polish into the toothpick and inserting it into the nozzle twisting it back and forth. On removal the sides of the toothpick were black with polish and metal particles. The hole at the tip had also benefited from the point of the toothpick coming slightly through to polish this as well.
This continued for a few minutes and less black came out so I washed the nozzle, blowing out the water.

A quick polish on the outside on the flat at the front and I was ready to put it back together.
Screw in the nozzle first, tighten slightly with a spanner. Screw the feed tube into the heater block until it comes to a stop butted up to the nozzle. Use the back of a drill bit which just fits down the feed tube to ensure that the ptfe inner is butted up against the nozzle.
Reassembly of the block to the extruder stepper motor was relatively easy.
Switching the unit on, I went through a z height calibration. Using a business card as the height gauge I adjusted all four corners- lifting it up in the z axis between movements of the x and y to prevent drag if the bed it too high.

I then auto zeroed the unit and the printed the howard dg-15 again. This time the print came out perfectly. well almost.
I have subsequently printed a few items without problems. So yes if you are struggling to print you may have to bite the bullet and strip and clean your nozzle.
Things I would do different the next time.
Use a thin wood screw to remove the material from the rear of the nozzle. A drill bit may be too brittle and snap off. Allowing the solvent to flash off firmed up the filament allowing easier removal.
Polish the whole of the nozzle, it not only looks good but will allow the filament to flow better.
Use an airbrush needle to polish the insides of the nozzle, wash well afterwards
Use a metal plate of the right thickness to allow for easier z axis calibration, a multimeter connected between the metal spacer and the heater block will tell when there is low resistance. With the card it is a bit woolly, and if the card is crushed slightly then the next corner comes down a bit. Or maybe an old credit card covered in copper tape to allow some give, with an led connected to a battery to visually show when you have just touched it.
Well if you have to clean your nozzle I hope that you can get some pointers from the above post and it ensures that the nozzle is clean and polished.
If you have any other tips or hints to add to the above on how to clean 3d printer nozzle, please leave them in the comments box below.
Thanks for reading
Phil
