What is 3d printing workflow
How do you get from the concept to something in your hand with an fdm printer….
What is 3d printing workflow: 3d printing workflow is the method of taking a concept of what you want and turning it into a finished model that does what it is intended to do.
Let’s break down the workflow into it’s what is actually happening – and this happens for each print you do, whether you follow these exact steps deliberately or just merge them in your head.
3d printing workflow
There are multiple steps within the workflow and these are broken down as :
- Concept : what you want to create – be it a broken piece or a new design
- 3d cad: design the article in 3d cad to suit the concept- taking into account 3d print design rules
- Stl translation: translate the 3d cad file into a mesh file that is necessary for the slicer
- Sliced: taking the mesh file and creating a layer file for the 3d pritner to be able to print
- Gcode check: always worth examining the gcode to see if it will look anything like what you want.
- Print: always a nervous time for the first layer but the exciting time to see the model grow
- Post processing: removal of supports, stringing, if necessary holes enlargement painting.
- Done: sit back and look at what you have created…..
let’s look at these in a little more detail.
Model concept
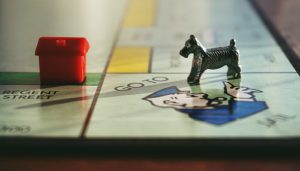

Something breaks, you find that you need a hanger for something, you have an idea that will revolutionize the beer drinking world, a missing piece from a board game….
All of these will spark off a need to build something.
So you buy a 3d printer.
It may happen the other way around – that you get a 3d printer and print a few models, get disappointed with some of the results and put it into the corner.
But sooner or later you find something that sparks that ‘i have something that will make that…’
You now have something in your head you want to bring into reality.
The first thing to do is to sketch it down with pencil and paper.
Look at it, can you imagine it doing what you need it to do.
Does it look like what you imagined.
Turn the paper, redraw it from a different angle.
Happy, well we can now commit to drawing it in a computer
3d cad programs
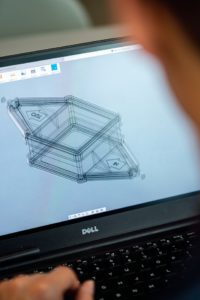

To some, now is the scary bit.
But 3d cad programs have come a long way to helping the user.
Some of them have basic building blocks – square, cone, ball, and a few others .
With these simple shapes you can build up hugely complex models.
Or if you are more of an organic person there is software that starts out with a ball and you can pinch, extend, add blobs and mould to get the final model.
If you are used to cad programs at work – there will be similar ones – freecad, fusion 360, openscad or similar.
So you can create your model in the cloud or offline to the level of detail you want and the measurements you take.
You may need to come back to this later after actually printing it and adjust it slightly to make it fit – it is normal in industry to go through a few iterations or designs before the final model is accepted and this is what 3d printing excels at.
Stl file translation
To get the cad model into a form that your 3d printer knows what to do with takes a two stage process.
The above model from the cad program needs saving in a format that can be passed through a slicer – don’t worry this is explained below…
But slicers need models in a certain format.
So the cad programs can export the model as a mesh.
Think of the surface of the model, the skin being made up of triangles.
So a curve looked at through a magnifier would consist of loads of triangles rather than this smooth curve.
And all these triangles need to be the right way round for the model to be watertight – yep it means what it says – another word for it is manifold.
The model needs to have no gaps or meshes the wrong way round or the next process gets confused.
You can use a lot of the cad programs to see the meshes to check them or there are specific programs to check the model – like netfabb
The exported file is in the form of a stl file – yep those are the ones you download from places like thingiverse.
These are the files sent onto the final processing before getting to the physical model.
They are processed in programs called slicers….
3d Model slicers
To get the mesh models to print on a 3d printer you need to simplify what the outside or the surfaces are like.
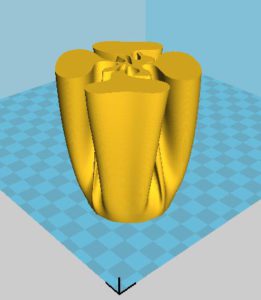

The 3d printer is really a 2d printer that can be raised in height, so almost a 2.5d printer building it one layer at a time.
It can’t turn the extruder upside down to print things underneath, so it needs a process that formats the surfaces into layers.
Or slices…..
Hence the term slicer – they convert your model into a number of slices that can be built up.
Understanding what slicer software can do, what you can change and what they have hidden is one of the keys to getting good 3d prints.
There are a few slicers out there, not all very user friendly and i hope in the future they will be built into the printer itself to make them easier to use…
We will see…
But in the meantime it can be one of the stumbling blocks for a 3d printing.
If we take one of the most common slicers, cura, and look at what you can adjust – currently ( april 2020) there are over 200 parameters in expert mode with everything turned on that you can adjust….
I don’t want to think of the number of permutations of changes you can make, but it will be in the billions.
This is one reason for quick and dirty prints, i keep an old version of cura ( all the old versions are still available) with it’s simple interface ( makes it a lot quicker to setup and get the file for printing as well)
I am also looking at another slicer with interest called slic3r, which prusa used to copy and add their own mods to, but they have now gone in their own direction and i will explore that one as well in the future.
But getting a slicer that works well with your printer makes your job here a lot easier.
This is the point where you are combining your cad with the material and the printer parameters.
You setup the materials, the rate of flow for the material, the layer height, the speed of the printer, and a few other settings.
Then you press slice, and it takes the model and creates a stack of 2d layers for the printer to understand.
This is the reason you get that characteristic ridged surface on the 3d printed model.
One thing i really would advise you to do is to check your gcode file ( this is the output of the slicer to be passed onto the 3d printer).
If you open the gcode in a program, you are not printing blind.
You can see what the printer will do, where it will start layers, where it will travel between printing parts, what it thinks is an inside surface and an outside face.
In small areas whether it will fill in the details or it will miss parts.
All of these can be sorted in the computer, within the limitations of the technology.
And there will be less failed prints and frustration…..
It is quicker and easier to make changes to the slicer now rather than waiting for the printer to finish…
Once the file has been checked and looks ok on the computer it is finally time to get it out into the world…
3d Printing
These have been around for a while now, they are getting better and easier to use.
The printer is in effect a 3 dimensional robot which lays down
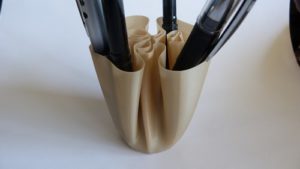

by Sashko- thingiverse
material when commanded.
So the gcode file the slicer creates is the one that needs to be loaded into the printer for it to replicate the original model.
This can be done with a computer interface ( making sure the computer doesn’t go to sleep as printing times can be quite long ) or it can be transferred to a sd card ( always my preference)
I do smile when i read in forums that the print got to 90% and the computer decided to carry out an update to windows…..
One way around this is to put your internet connection on a metered connection and windows will always ask to update itself……
So you heat the hotend, insert the material you want the model in, select the file for the model and wait…..
The heat bed heats up, the hotend stabilises…and the nozzle moves towards the bed…..
And with its familiar dance across the print bed it starts to lay down material.
And questions start to arise in your head from memories past.
Will it stick to the build plate, did i level the bed enough, when was the last time i cleaned the bed, will i have another power cut…..
But fortunately in this case you have learned that to have the nozzle a little too close to the bed is better than too far away…
And you can cope with the little bit of squish to trim off after.
I always watch the first layer to gauge whether the model will stick.
And yes sometimes it does go wrong, but if you are there for the first layer then you can abort the print, clean the bed and start again.
Maybe even leveling the bed a little before stopping the print….
I do normally pop back to see how the model is going – i am fascinated with seeing it ‘grow’ from the print bed.
As the nozzle and the bed do their dance to create material in the right place to form what has been programmed.
And looking at the screen and seeing 100% with the nozzle lifted away and silent always puts a smile on my face.
And with a sigh i take the scraper and starting at a cornertry to remove the print from the bed.
And move forward to the next and final stage of the 3d printing workflow…
Post processing
Getting the model off the bed is not always an easy job…
I have seen numerous glass plates with chips out of them where the model has stuck and pulled a piece of glass form the plate.
Or in my case with the paper tape on the metal bed, i have ripped up the tape to remove the model from the bed, only to not be able to remove the tape from the model.
But with the model removed you can now hold it up, turn it around – start to examine it .
Does it look like what you originally conceived, has your mind vision been translated into physical reality.
If it is something to replace a broken part, now is the moment of truth….
Does it fit…..
A lot of time you do need to fettle (technical term for filing, cutting and adjusting the size) things like hole sizes, depending on whether you left enough tolerance for the print.
This is where you will learn what your printer is capable of at the moment and can go through adjustments in the cad program and forward in the workflow ( so reducing the amount of material extruded ) to get a piece you know the size of.
Do you want a smooth finish, does it need a little more curvature.
All these post processing procedures can be now carried out on your model.
Smoother finishes can be material off or filling in the layer lines.
Then spraying with a finish.
More curvature can be change the cad file, or in the case of pla…
Place in a up of hot water – leave for a few seconds – remove and gently adjust -hold until cool.
But now to have something that a little time ago was just a thought in your head, or a broken article that now has a new lease of life.
With a file that can be shared with everyone around the world to make.
For me it is one of the more magical moments.
I have made a few pieces for childrens doors, and the looks you get when they see it for the first time is really priceless.
Making lithophane lamps, which portray their favourite characters when lit up.
Or giving to grandparents an image of the grandkids when lit from behind.
Finally…
There are endless possibilities to create and repair things with a 3d printer.
Once you have got bitten with the bug you may never stop.
And you may not stop at one printer.
This is mainly due to the time it takes to create the prints….
So one becomes two….two become three…..you know how it is…..
But this workflow is something you get used to.
It looks a lot, but lot of the time you will download the model in stl format, so shortening the workflow.
It relly is worth checking the model for manifold, and then after creating the gcode to reduce the disappointment.
And keeping your printer in good working condition, rather than waiting for something to break before repairing it.
You can’t cover everything and they will go wrong or need parts replaced.
So keeping spares in stock reduces the frustration of not being able to print now….
But i hope this has shown you a little of the workflow of 3d printing and has inspired you to give it a go…..
What ….no 3d printer….are you going to let a little thing like that stop you…..
Nowadays you can design the 3d model and order one online from 3d printing shops.
The model appears in a few days through the post.
You can then see how close you are to your vision.
So no excuses and it might make you take up the hobby…..
Thanks for reading
phil
