This is the Second installment in the 3d printer project ideas: Salt Grinder repair project, if you missed the first part then click here.
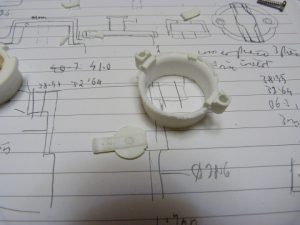
So the first section dealt with the fact that the salt cellar had broken and I need to fix it – or buy another one.

I was also looking at learning google sketchup, but I found that after having a good go at it I was left with a model without a bottom. I could not fix this and after reviewing another 3d printer, the Cubepro Trio, I came across their basic design software – yes it costs money but is free for 15 days.
I will review (#amazon link) Cubify Invent shortly as I feel it is a very good CAD system designed specifically for 3d printers. For 3d printer project ideas this software, for the price is excellent value for money, yes there are free CAD programs available and i will trial them. but for ease of use and fit for purpose at the moment I cannot fault the program.
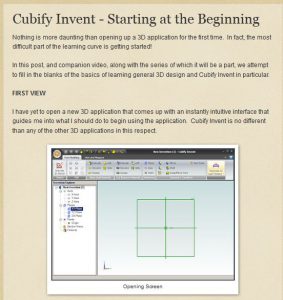
Another web site has tutorials on this software, if you intend to get it I would advise watching these to get the concept behind the CAD. This helped no end and so today I looked at the part again and redrew it from the ground up.
Starting with an outside circle and adding an inner ring along with the retainer- the main piece that was broken on the original.
Moving up to the keyways and retaining screw holes.
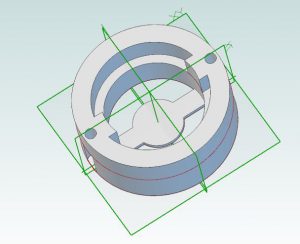
This time the whole piece was drawn up in an hour. Wow – even for me that was quick!!
With sketchup I had to make sure the model was closed and had no spurious lines within the model, not with Cubify Invent, as it is designed to work with 3d printers then it produces a model suitable for 3d printers.
Exporting it to stl out of Cubify invent is simplicity itself (file -export).
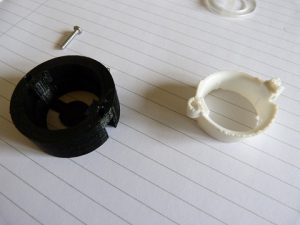
Taking it to the machine by the printer and passing it through CURA to get the g-codes, I printed it out.
The whole print took 35 minutes. About 1m (3 ft) of material, I am using PLA at the moment.
Offering up the ceramic part to the print I found that the printer had overshot, it was far too tight!! The keyways had a extra piece at the ends, where I need to examine the operation of the printer again. The part could be cleaned up by filing and sanding down, this would prove tricky in the corners of the inner circle so i decided to scrap this one and revisit the cad.
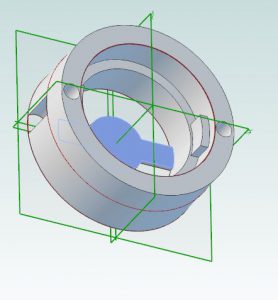
So back to the software. I now needed to modify the part! Not always easy with a lot of cad and with simple models it is sometimes better to start again.
But now I have found out a bit about planes, and the drawing tree down the side (right click and select edit) I decided that it must be possible to modify it.
Going up to the first sketch and editing it to increase the outer diameter was simple. Increasing the inner hole size next.
Moving down the tree and looking at each of the sketches I was able to modify the model to try to ensure a good fit next time.
I allowed +0.5mm for tolerance so hole diameters were opened by 1mm.
The screw hole diameter could only be opened by 0.5mm or the hole would break through the side.
This model was saved as mk2, and run through CURA to get the g-codes.
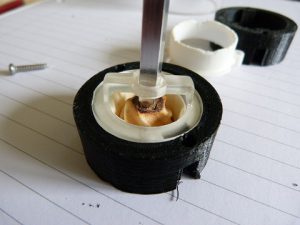
Another print and removing it off the build platform I set about trial fitting the various parts.
The ceramic inner dropped in as did the plastic retainer – uh oh !! it seems to be going too well.
Trying the screw they also dropped through the holes.
So assembling the salt cellar with its main grinder piece, I was surprised but pleased that it all fitted back together.
What would I do different?
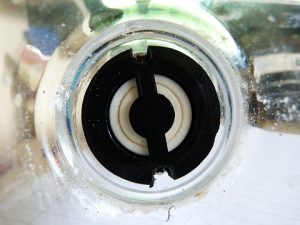
The screwdriver bit is very tight when screwing it back together – so don’t forget tool clearance.
Trying the grinder the some of the salt crystals are big and will not go into the grinder mechanism, this would be corrected by leaving more space between the bottom and the inner grinding piece ( make it 1mm longer!!).
Other than this and it appearing a bit ‘heavy’ on the bottom ( thickness of the rim) I am quite happy with this- I may come back to it in the future with an improved design, but for now this is good enough.
So this is the use of a 3d printer – you find something that is broken and design – or copy the broken part – into CAD. Translate that into g-codes and then print it out.
If it need modifying you can do this, reprint and check for fit.
Once it fits you reassemble the finished piece and admire your handiwork.
It is satisfying to be able to produce parts, which in the olden days would only be available to machinists. Now are available to people who can use CAD programs. If you struggle with the CAD then there are houses who will produce the files – or even the finished parts for you. Meaning that that old piece which you have been meaning to get to fixing can now get finally fixed with a proper solution. Or the idea you had about improving that piece and never had the ability to achieve you can now go ahead and draw up in CAD and print it out.
What have you got lying around the house that you mean to get fixed and have been waiting for the ideal moment? Leave a comment below about what your 3d printer project ideas are and we can share in the versatility of the printers.
Thanks for reading
Phil
