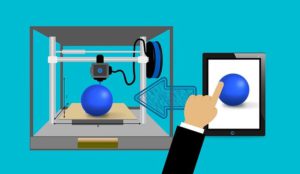
Believe it or not your 3d printer is a dumb machine. It needs to be told exactly what to do and when to create those wonderful models you require from it.
So how does your 3d printer know what to print: The file you create with your slicer tells the 3d printer exactly what to do and when to do it. It contains commands to move the printhead and how much material – if any – to place on the build plate and the heat the bed and nozzle need to be kept at.
Your 3d printer contains mechanical parts – the stepper motors- which need telling what to do. You also have heaters which need to know what temperature to be at…
What tells your printer what to do
Your 3d printer is a bit like the old paper printer in the respect that it needs another computer to tell it what to do.
You can think of your 3d printer in the respects of the paper printers.
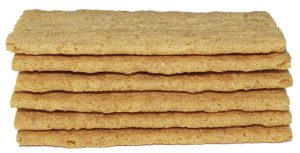

Think of a pile of paper sat next to the model you want to print.
If you could push the pile of paper into the model then each
piece of paper would have a slice of the model on it.
If these are printed out in the right order then what you get with your 3d printer is a finished model.
If they are not printed in the right order what you get is a mess of plastic….
What are slices
As shown above you can have a pile of paper the same height as the model to represent each individual layer of your model.
But you can change this – within reason- with the size of your 3d printers nozzle.
The larger the diameter of nozzle the thicker the slices can be.
So instead of paper think cardboard….
A lot less slices.
But with that comes a lot less detail.
So if you are printing a plain box with little detail, would you use the finest nozzle you can or the largest nozzle to get the job done quickly…
I know i would be using the largest nozzle…
As i said you can control the thickness of the slices, this is done in a slicer program on your computer.
What does the slicer do
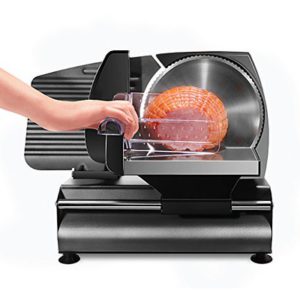
A 3d printer slicer does the same job as those meat slicers in the butchers.
Place the model in where the lump of meat goes .

by Flickr
Dial in how thick you want the meat ….
And slice it off layer by layer.
That’s where the analogy stops as the slicer has to recognize what is an outside layer.
How thick have you set the wall thickness to be and what infill do you want.
It is a pretty complex program which takes your model and cuts it up into slices and works out where to position the nozzle and how much filament to extrude at that time.
And when it is moving between printing areas to turn off the extrusion and move quickly to prevent oozing and start printing again.
As the inside of the mode is not seen it doesn’t have to be full of plastic, so can be printed with an infill of a certain percentage, just to support the structure as it grows upwards.
You can adjust this infill, right up to full, to allow the parts to be used mechanically.
To allow the material out of the nozzle it has to be heated up so that it becomes runny, but not overheated…
So the slicer tells the printer that the nozzle needs to be at this temperature and the printer adjusts the heater until it reaches it. The printer now controls the nozzle temperature until told to change it.
The same with the bed temperature to help the model stick to the buil platform.
Every little move, very little extrusion must be listed in a file to control the various parts of the printer correctly.
So the final push of the slice button may, on a complex model take a few minutes to create the file for your printer to create the model from the screen.
What is g-code
The file the slicer produces is in a format called g-code.
This was invented to control CNC machines – or even further back for manufacturing pcbs.
The pcb’s conductive layer is in effect a single slice of a model, and can be printed using conductive filament…..
As CNC can work in 3 dimensions this format was thought to be ideal for adopting for 3d printers.
There is a move to change the format to one which is more suitable, but the adoption is slow…
So…the g-code – what does it look like….
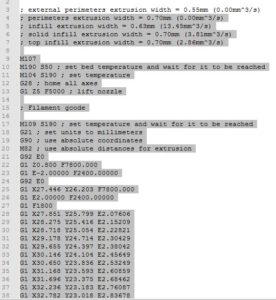

This just looks like a bunch of numbers with letters in front – and that in essence is g-code.
It tells the printer where to start and then how far to move in the x direction and y direction, how fast and how much material to extrude over that time.
Then at the end of the layer is tells the z axis to move up to the next layer.
And it follow this file step by step until is reaches the end.
Where it switches off the heaters for the extruder and bed, makes the stepper motors go silent and waits to print the next model.
What are the main codes in a g-code file
The file commands th printer to go through a process.
The first command usually is to home the printer (G28), so that it know where it’s printhead is.
Then it heats up the bed and then the nozzle( M140,M104 and M109).
It usually raises the nozzle and goes to the start point for printing(G0,G1).
And now goes through the move and extrude commands in the file.
Even for a simple 25mm square calibration piece you have thousands of commands, depending on the layer height.
How do you get the file to the printer
There are three main ways to get the g-code file to the 3d printer and they are :
- SD card
- Usb cable
- Octoprint
Copying the file onto an sd card and inserting it into the printers card slot allows you to select the file to print.
There can be issues with sd cards not being read– with the shaking that the 3d printer does and the card slot being on the casing can make the contacts intermittent and fail to read the next command, in which case the print fails.
This can happen at any height, but with the anet a8 it usually happens as the model grows in height and the slightly unstable frame rocks a bit more.
But it is normally a reliable method of file transfer and means you can power down your computer or use it for other things while printing without worry.
If you decide to use the usb then you need to make sure the computer does not go to sleep while printing.
Or update any software to make it reset – a common problem with windows….
It also means the computer needs to be located close to the printer – not always convenient to use at the same time.
And you need to not overload and stop the usb from communicating as the printers are not overly intelligent and will crash with too many commands.
Alternatively you can add a raspberry pi with octoprint to control your printer.
You can communicate with it wirelessly – sending the file over for the model and then this is sent onto the printer.
You can get feedback on how the printer is doing, how much longer the print has to go and other information that means that you can locate the printer in a remote part of the house if desired.
And finally….
So you now know how your 3d printer takes the file from your slicer.
Where you have set the height of the slices and what the filament needs.
Which the slicer finds the paths of the model to create the outer skin and the infill.
In the background it is a very complex process, but on the surface one which is getting easier to use.
And hopefully in the future even easier, with the slicer embedded into the printer itself.
Then it will be download or create the model and select the quality and hit print….
At the moment you need a few more steps and to follow a workflow.
Getting used to going through a process will prevent you from making too many mistakes -we all make them don’t worry…..
And being happy with the newly created model from your printer is what this process is about.
Understanding a little more, when you see the g-code now it may not be all confusing as you start to see a pattern or use craftware to view the model before you print and see the holes and start to know what to alter to repair them.
If you have any questions about this process please leave them in the comments below and i wish you good printing.
Phil
